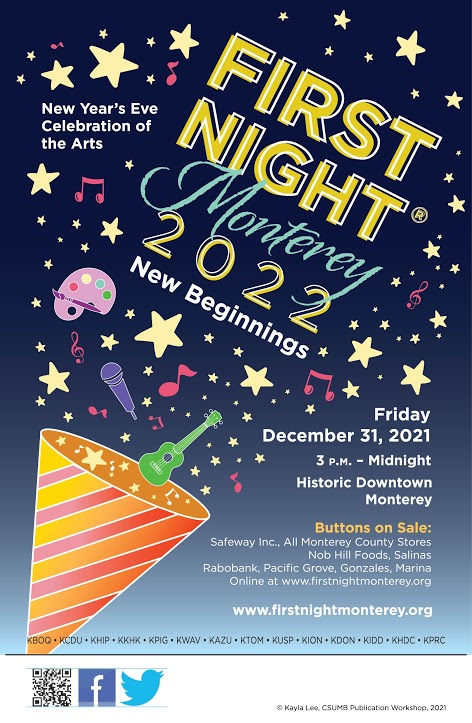
Description: First Night Monterey is a new year celebration event that has a long history. This poster is the winner of the FNM 2022 POSTER CONTEST, and it is used as the official poster of this year’s event. Localizing this post allows more people to know the existence of the event and celebrate the coming new year together. The challenge of localizing this poster is that there are three different fonts in the poster and the poster looks a litter fuzzy because the original file is not clear enough. I will try to figure out a way to make this poster clear enough.
SOURCE FILE:
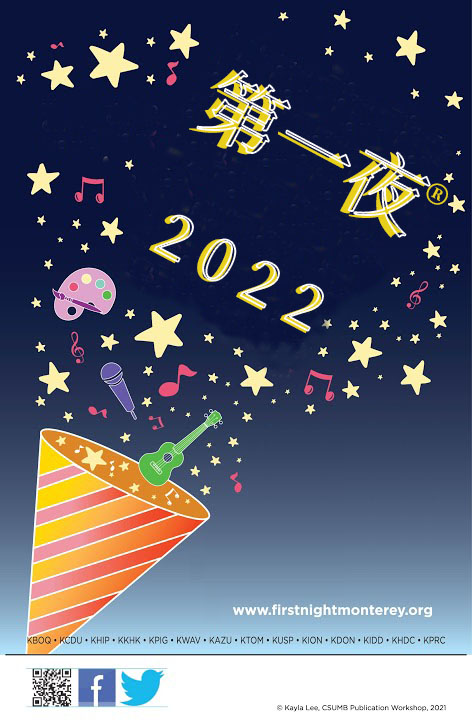
TARGET FILE:
PROCESS:
First, I cleared the background using the clone stamp tool. Since I used a clone stamp, the transition part of the gradient is not natural enough. But after it was covered by the text, the uneven color of the gradient part became less visible. Therefore, this method is also acceptable.
Second, I added the text box to the file and adjust the text into a special effect. There are two difficulties in this part, one is the need to find the right font, and the other is that the font needs to be hollow. In addition, the font in the middle of the poster is tilted, so we also have to tilt the font by 28°.
The text “Monterey” in the poster has a special font that does not exist in my font library. Therefore, I found the calligraphy-like font on Aa fonts and downloaded it.
I didn’t find a hollow font, so I used the stroke effect for this purpose. First I created a text with the same text as the solid text, added the stroke effect, and then set the “Fill” to 0. In this case, a hollow font is ready.
Third, after adding other necessary texts, the localization of the poster is done.
WORK SAMPLEVIDEO
To visually show how I localized this poster, I recorded a video to explain the process. In this video, I show how I used Photoshop to localize this poster. I also cover a few of the difficult points, which I hope will help you.
I decided to modify an Ae Template first and then localize the video into Simplified Chinese. After the video is rendered in Ae, I will add additional dubbing and background music in Pr.
I download the template on a resource website – Evtato Elements.
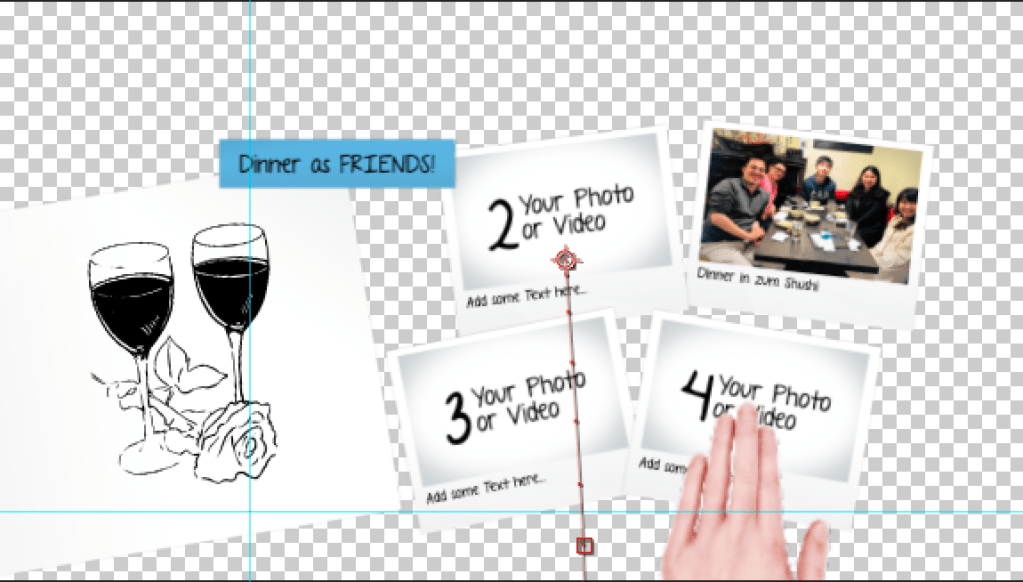
Here is the original Ae template:
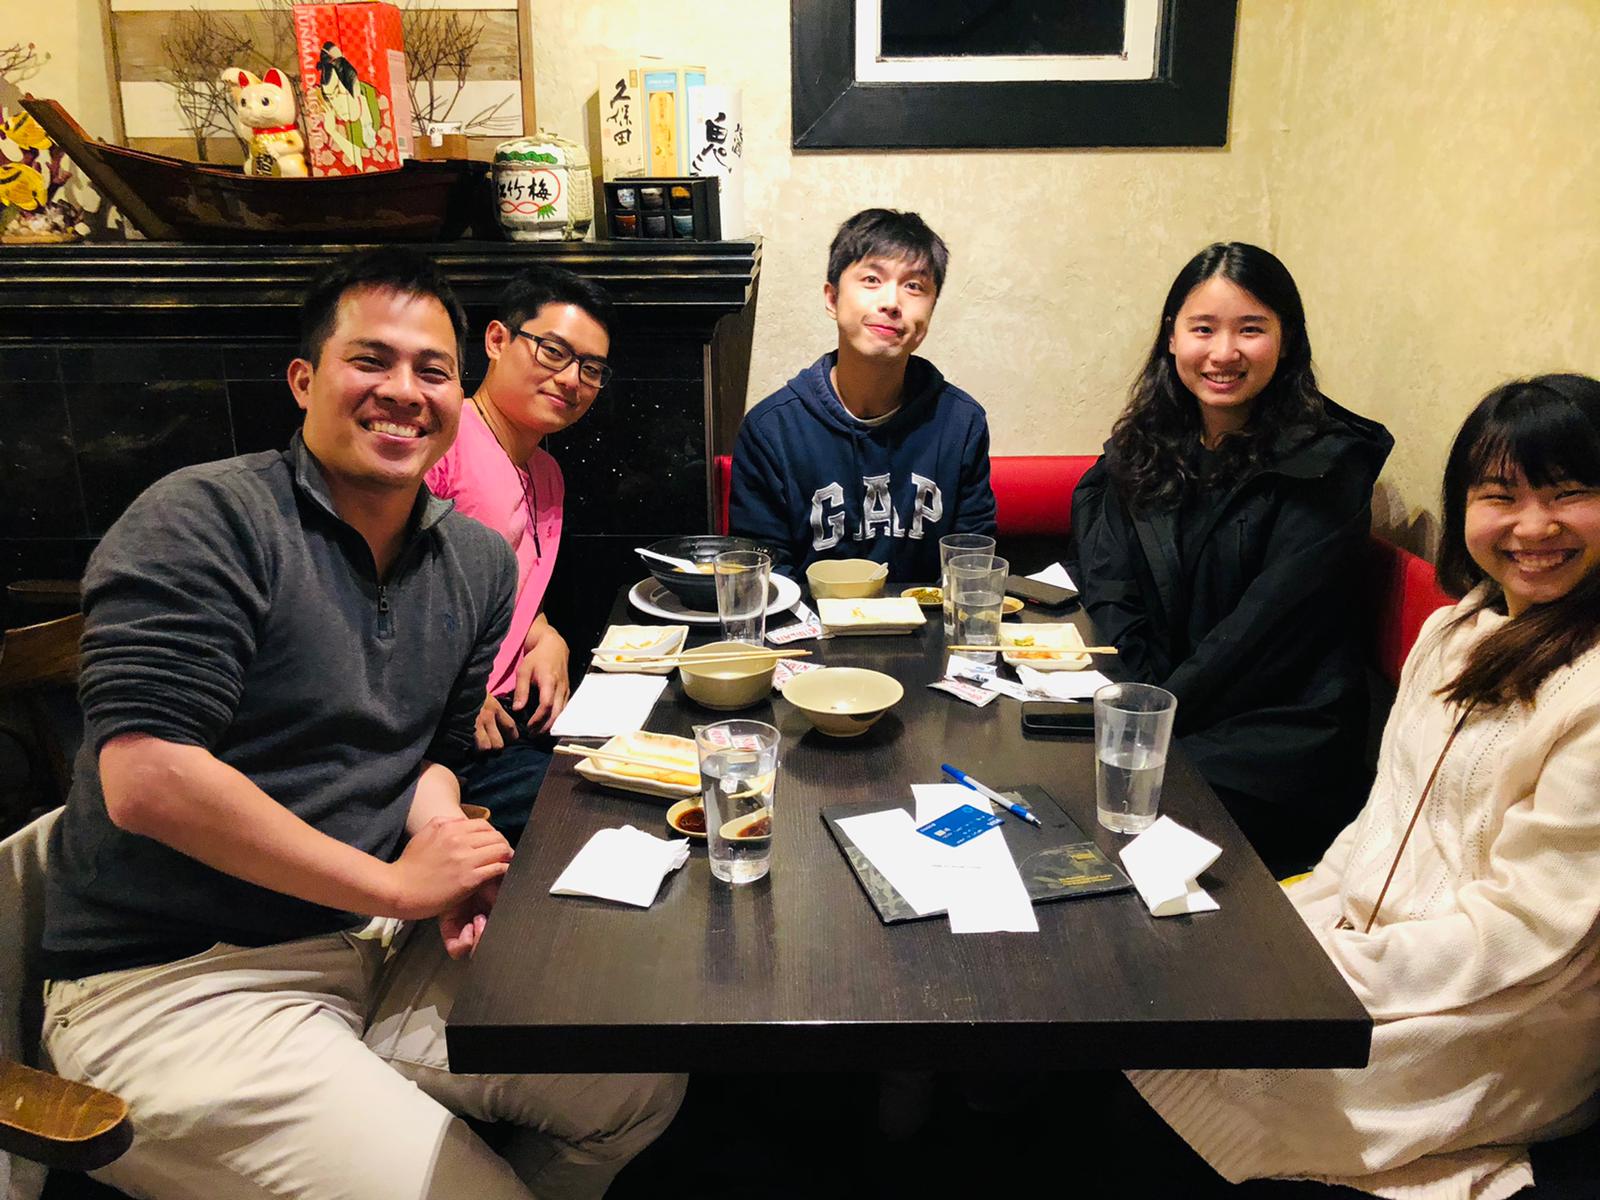
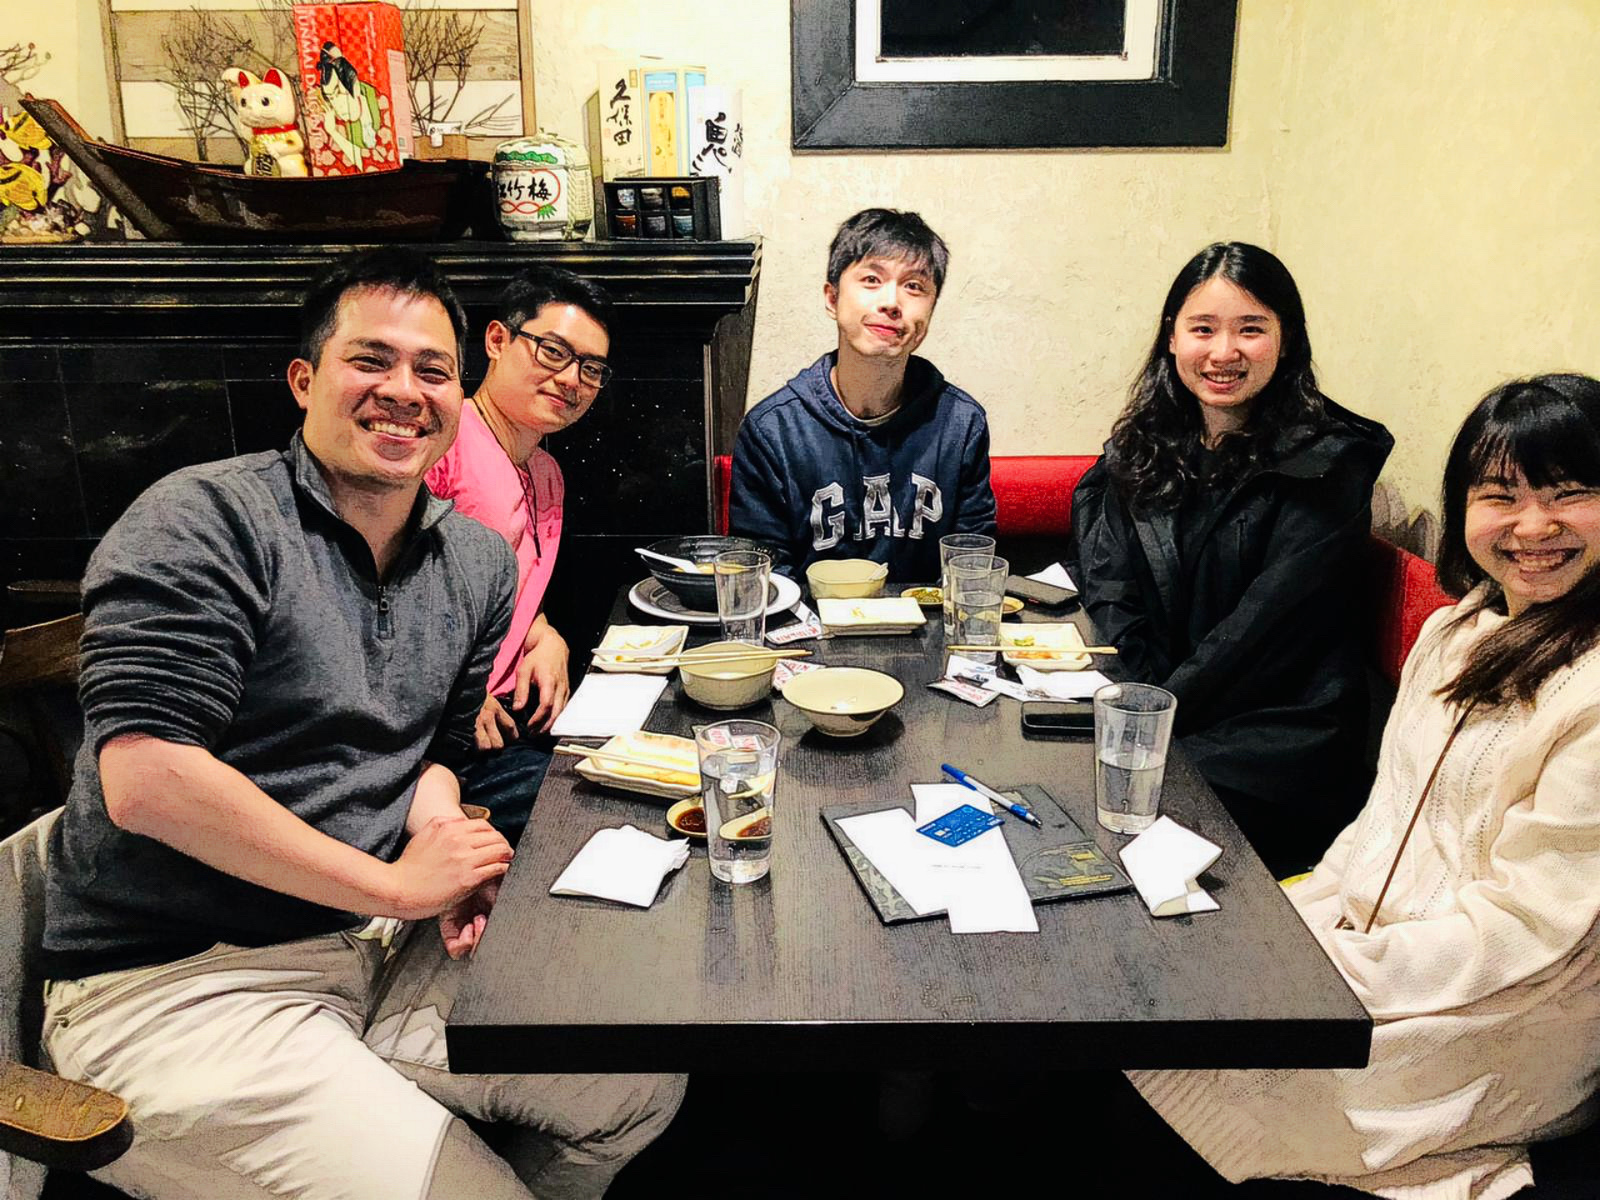
It’s an animation of a love story so I decided to modify it and memorize the moments of me and my boyfriend.
Modifying Video
Font
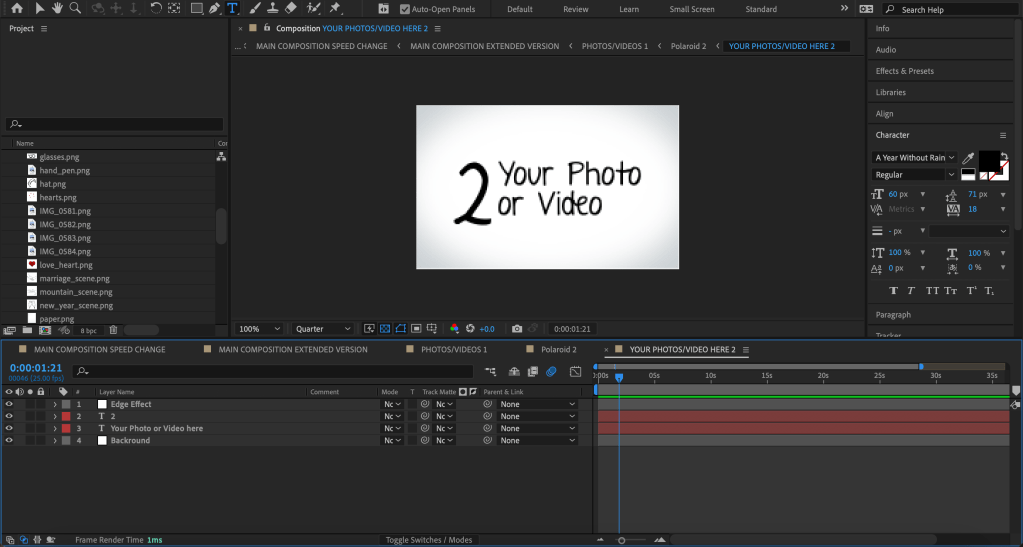
I didn’t have the font that the original video used, so I need to download the original font – A Year Without Rain according to the instruction from the template.
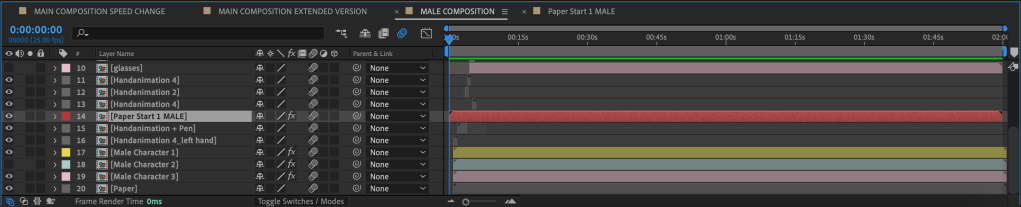
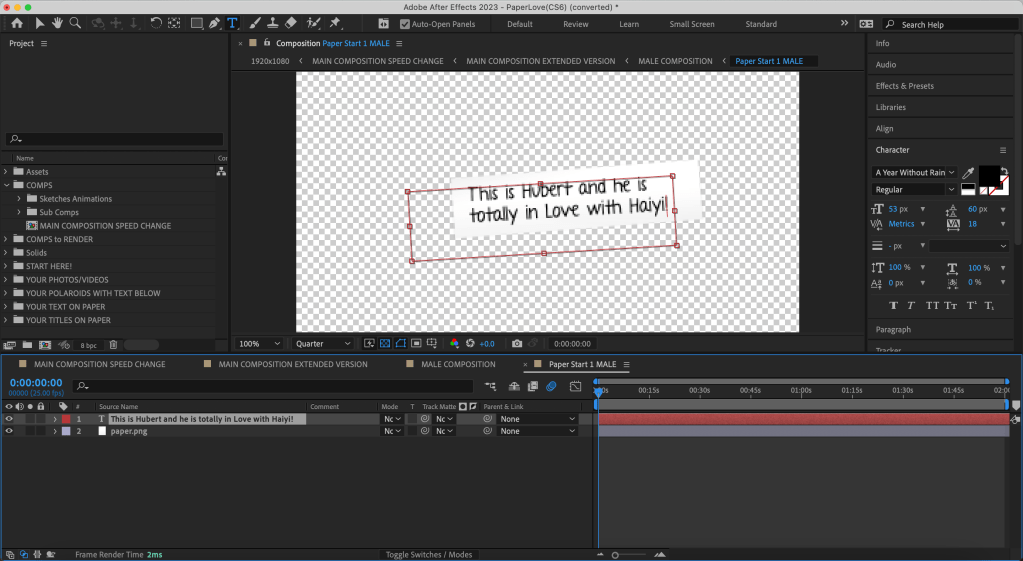
Text
One of the difficulty is to locate the text object. Different from the class tutorial, I didn’t have a hint of where the text object is hidden. So I spent a lot of time to find where are all those texts.
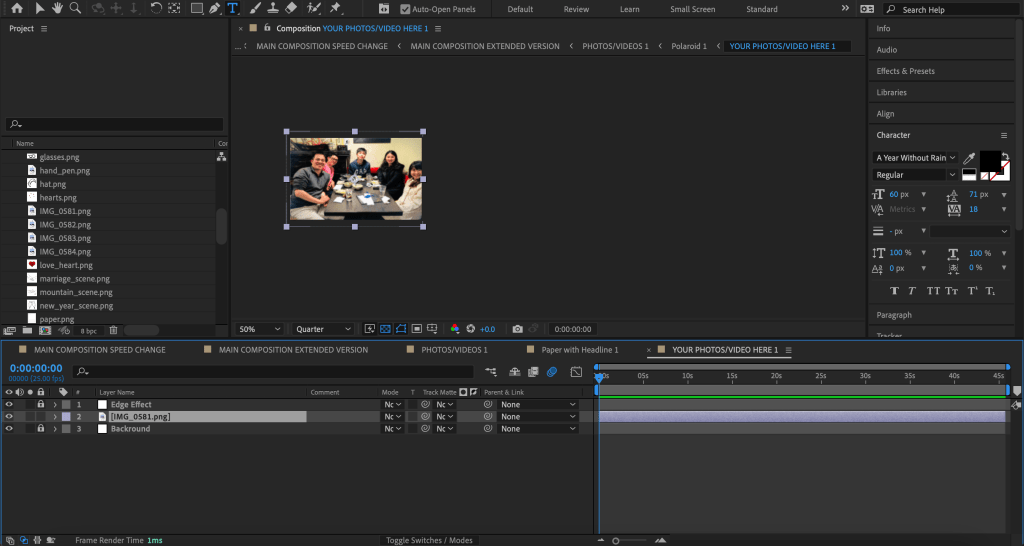
Images
This video required a large number of images, and I had to upload them myself. Considering that the video as a whole is hand-drawn animation, I processed the real pictures to make them more like hand-drawn paintings.
Then what I had to do was to replace the image in the location of the Polaroid photo in the video with my photo.
To perform this, first I needed to drag and drop my photos into the Assert Folder. Then I had to find the path to the photos and replace them.
I deleted the original texts and replaced it with the photo I prepared.
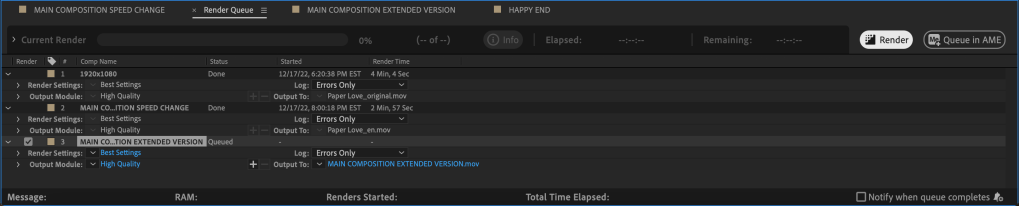
Render
After the adjustification is done, I added the file to render queue, and rendered it.
Since I deleted two scenes, there was a relatively long gap in the articulation. And, for unknown reasons, the animation of the last two photos was particularly fast. Meanwhile, the video is lack of background music, I need to find a suitable one in the music platform. These were the issues that I needed to make further changes inside Pr.
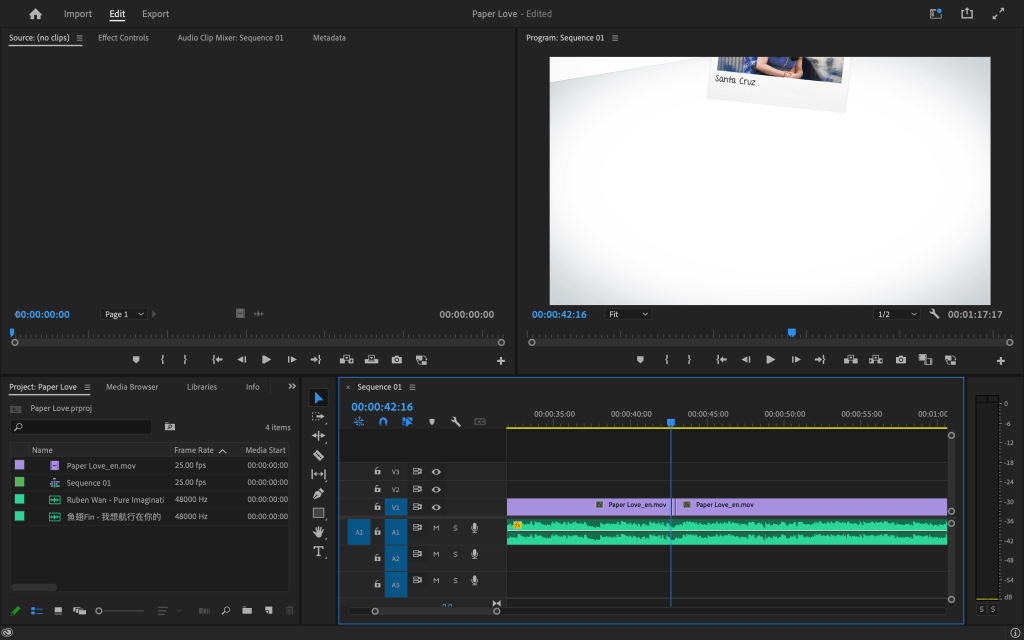
Editing with Pr
After importing the video into Pr, I chose an appropriate background music. Then, I speed up the overly long blank articulation.
Here is the final English Video:
Localize the Video
To localize the video into Simplified Chinese, I first edited the texts in Ae. Since the original font didn’t support CCJK, I downloaded another hand-written style font that supports CCJK.
With the same process, I edited the video in Pr again.
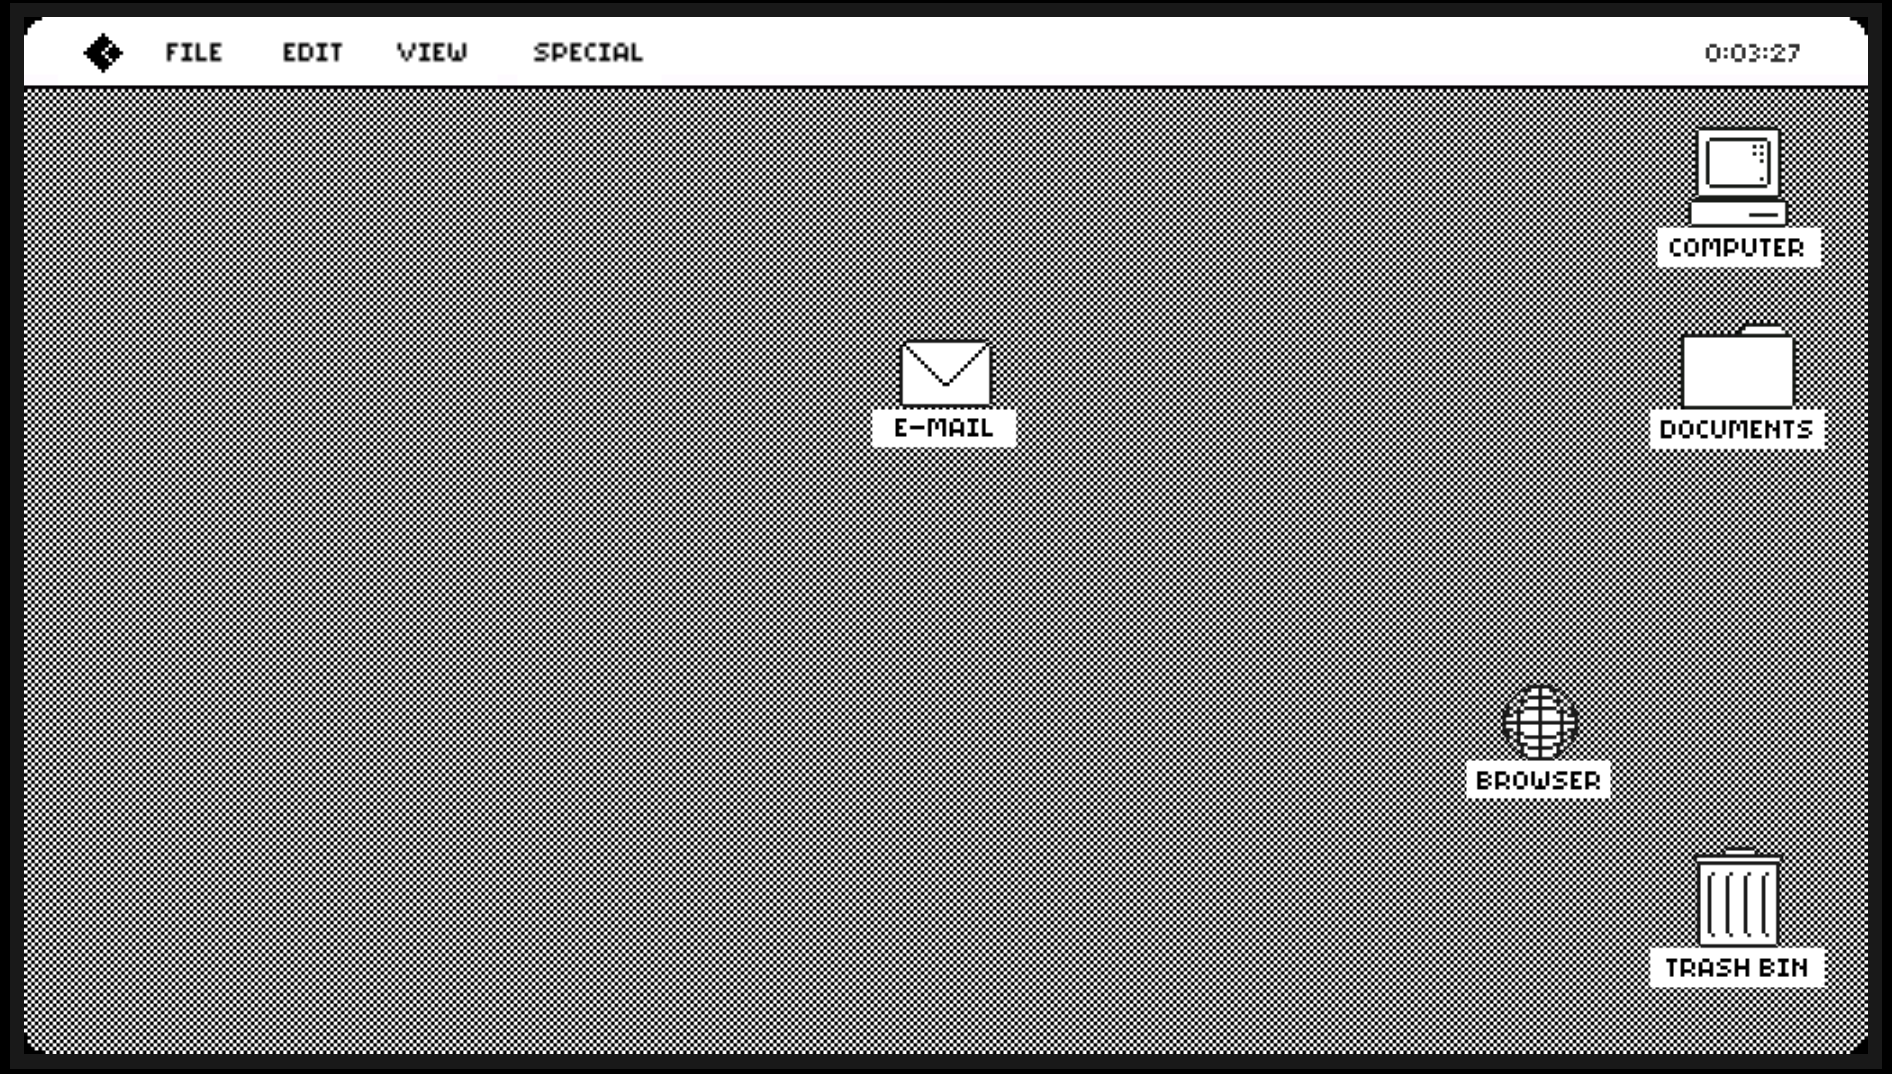
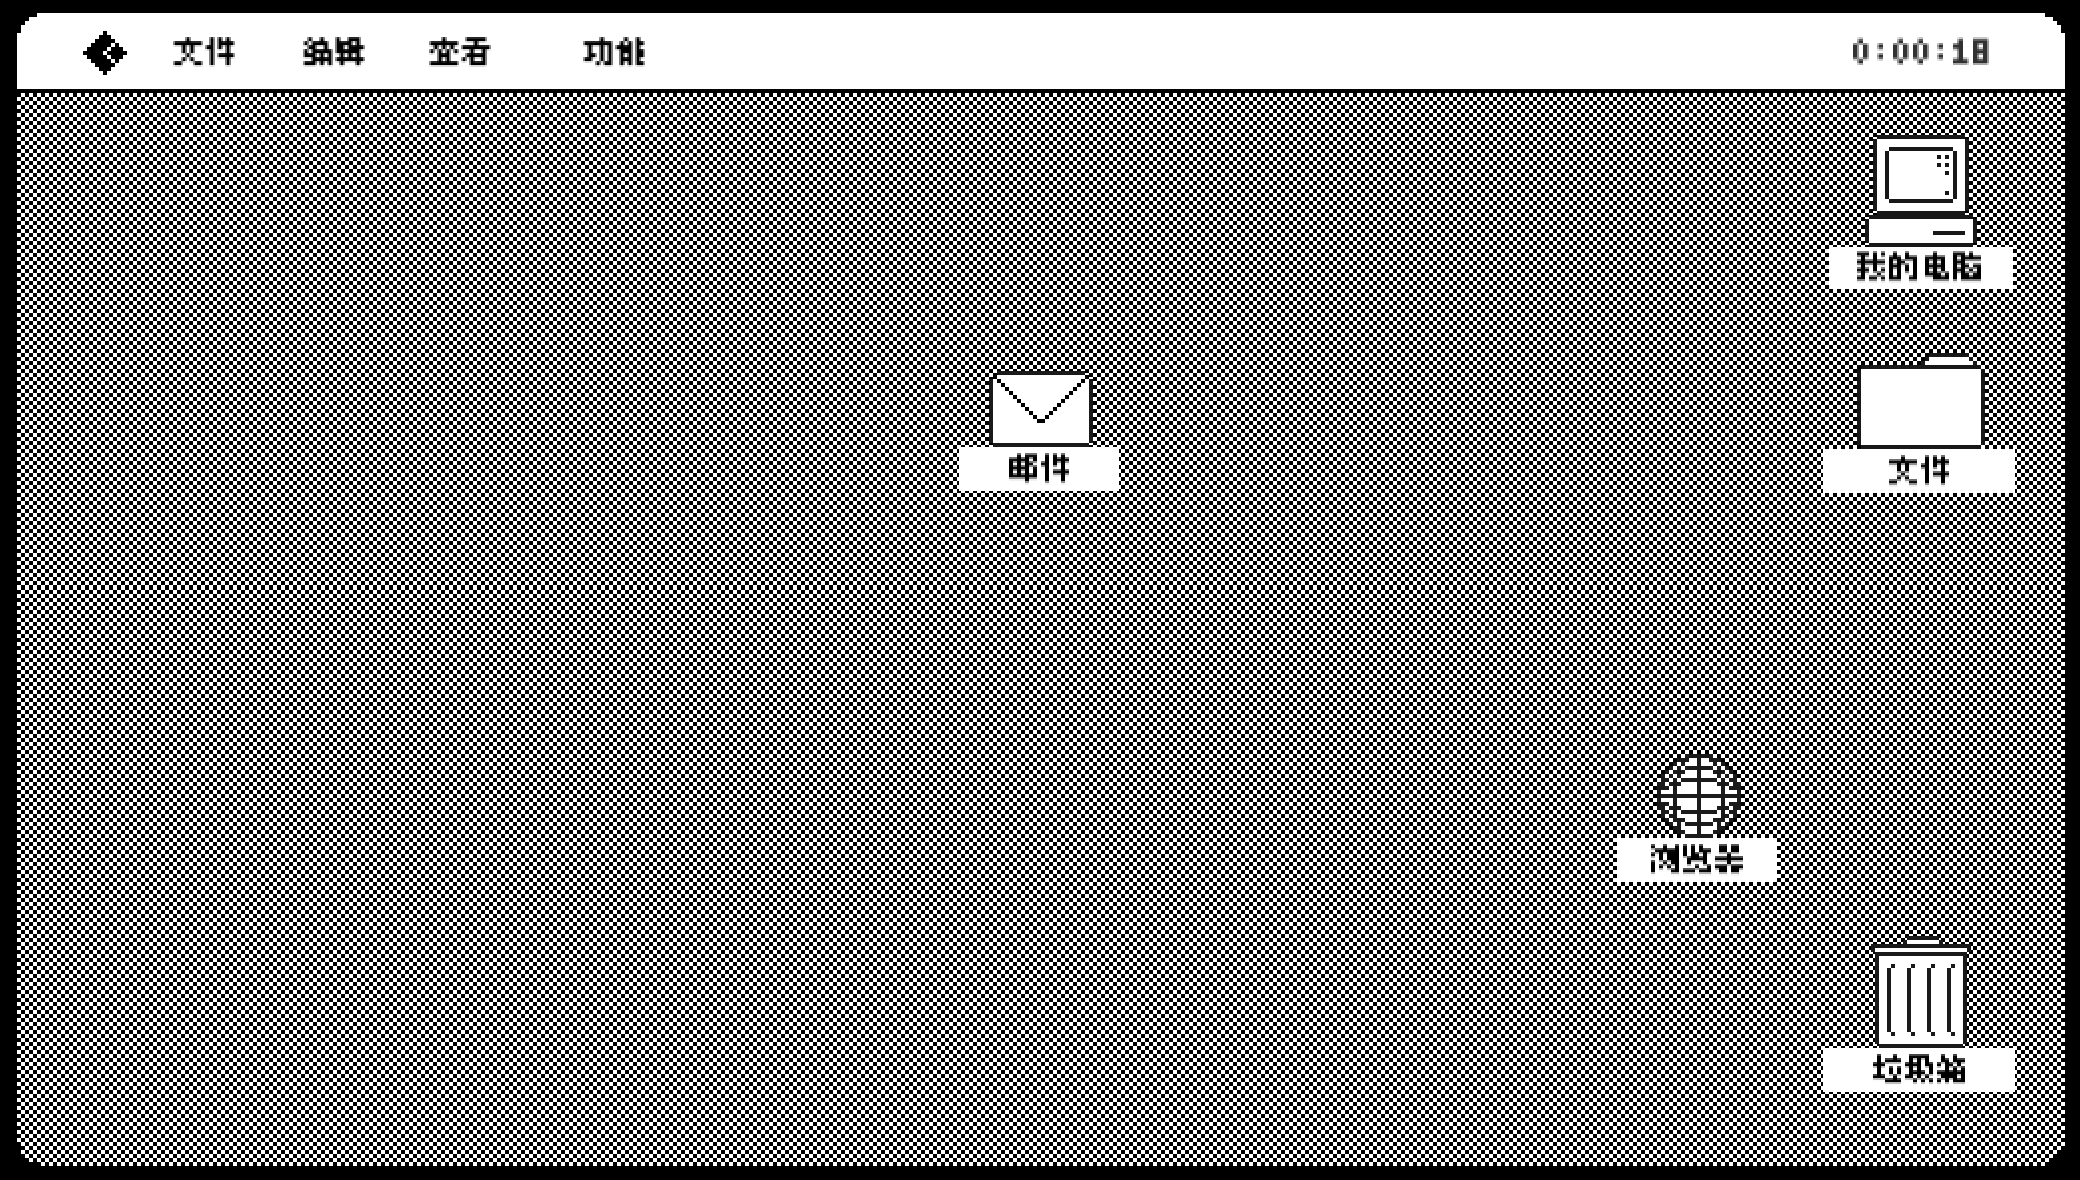
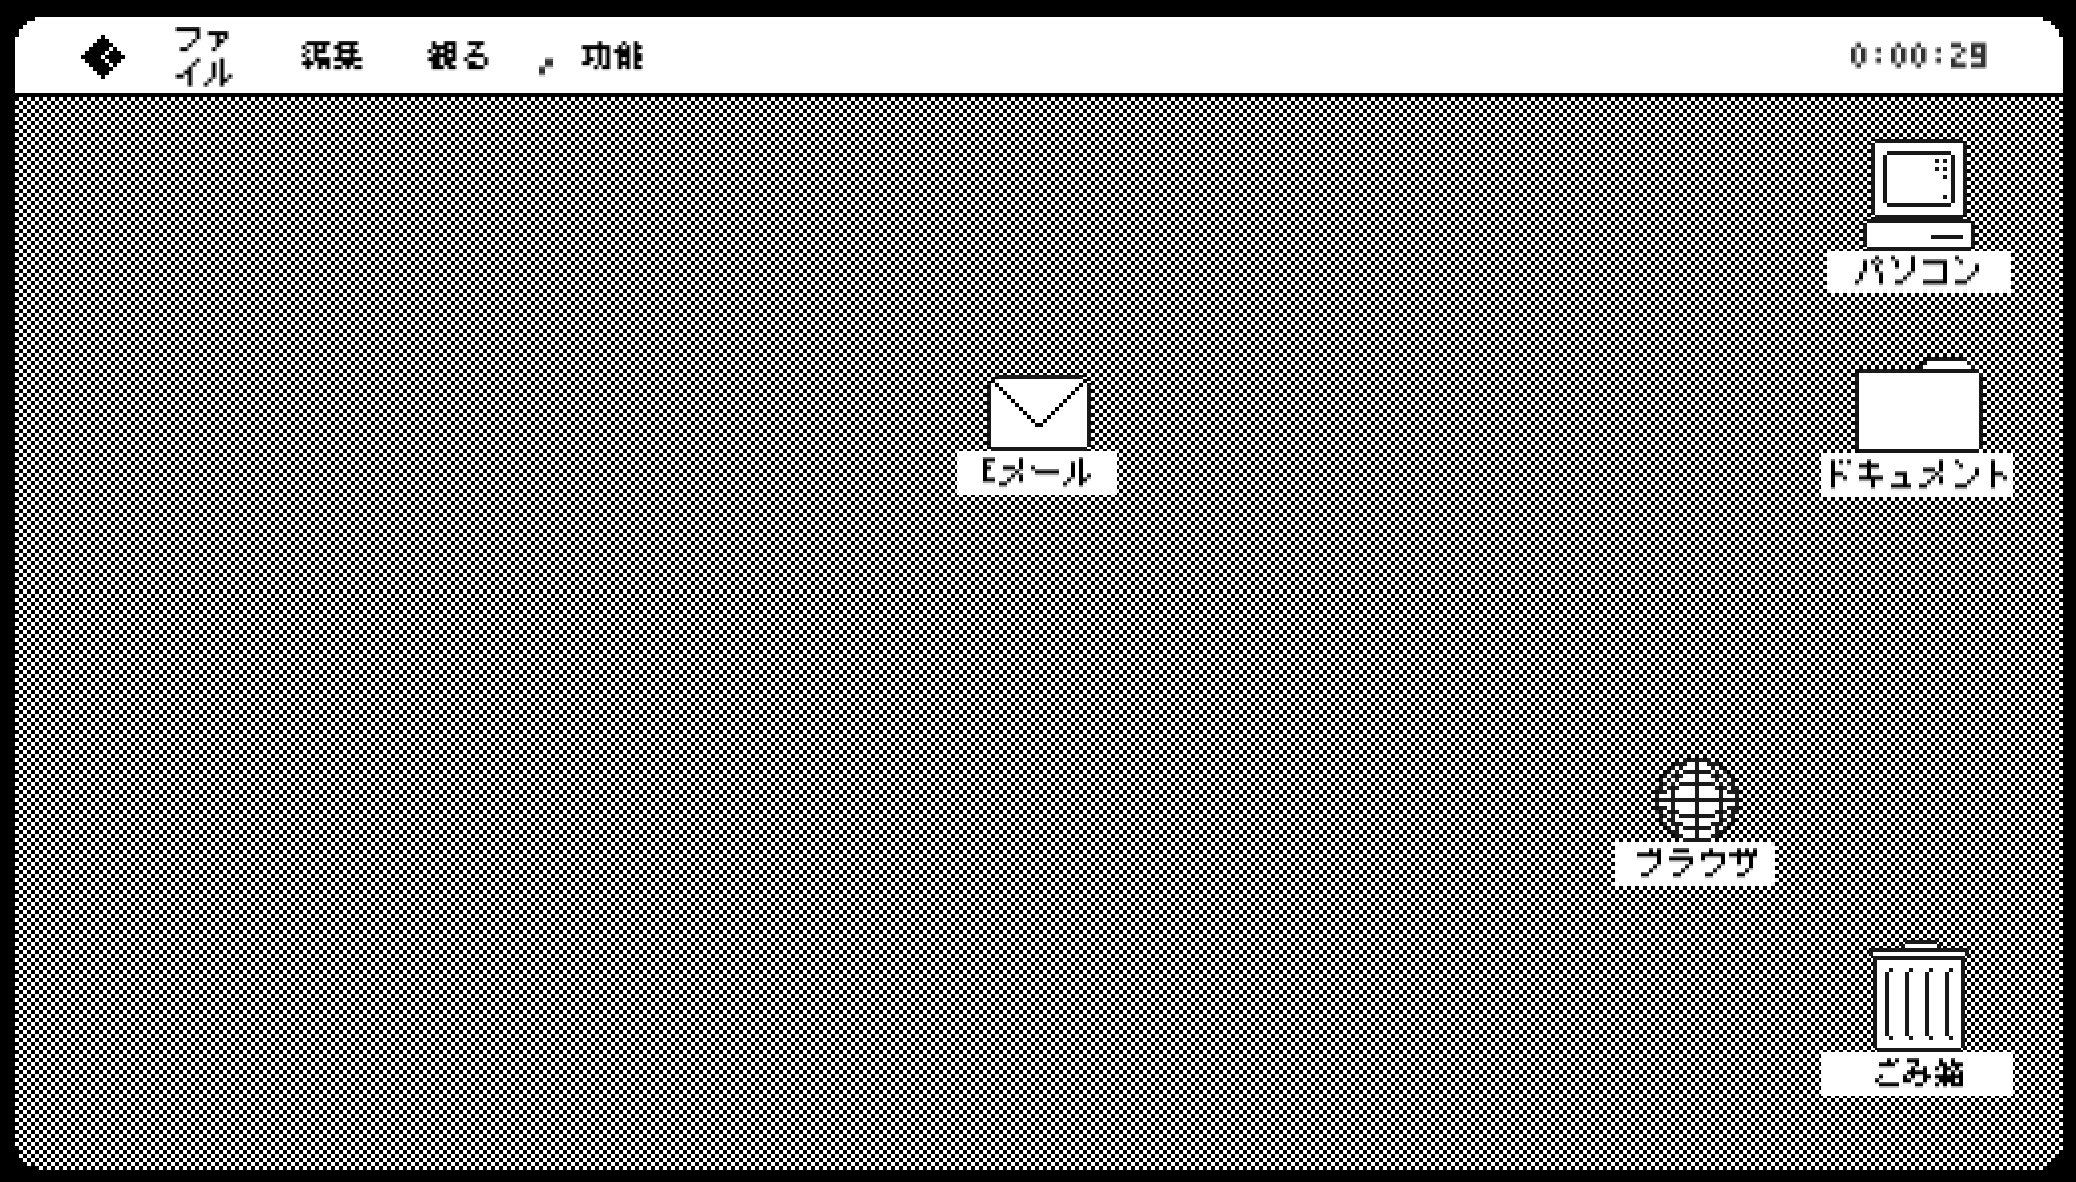
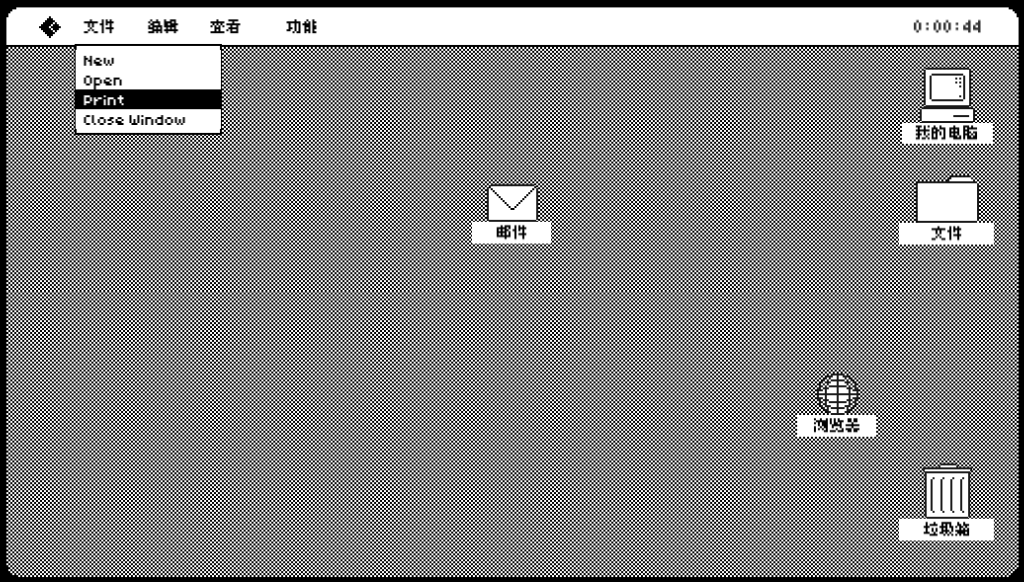
For this project, my colleague Yiwei Wu, Haoyang Qin, Yun, and I decided to try out our hands at localizing an open-source Unity game Glitcher into Simplified Chinese and Japanese.
Glitcher is a Tactical Espionage game where you play as a computer virus. It was created by Rafi Emilio Alam & Sarada Chen for the Github Game-Off Jam 2017.
There are a lot of text information in the game and most of them can be searched by “text”.
The original font doesn’t support CCJK, so we find another font, which has the pixel style.
Globalization Function
To enable localization, we used the method learned in the class.
First, we installed the localization package , typed in com.unity.localization under “Add package from git URL” in the Package Manager.
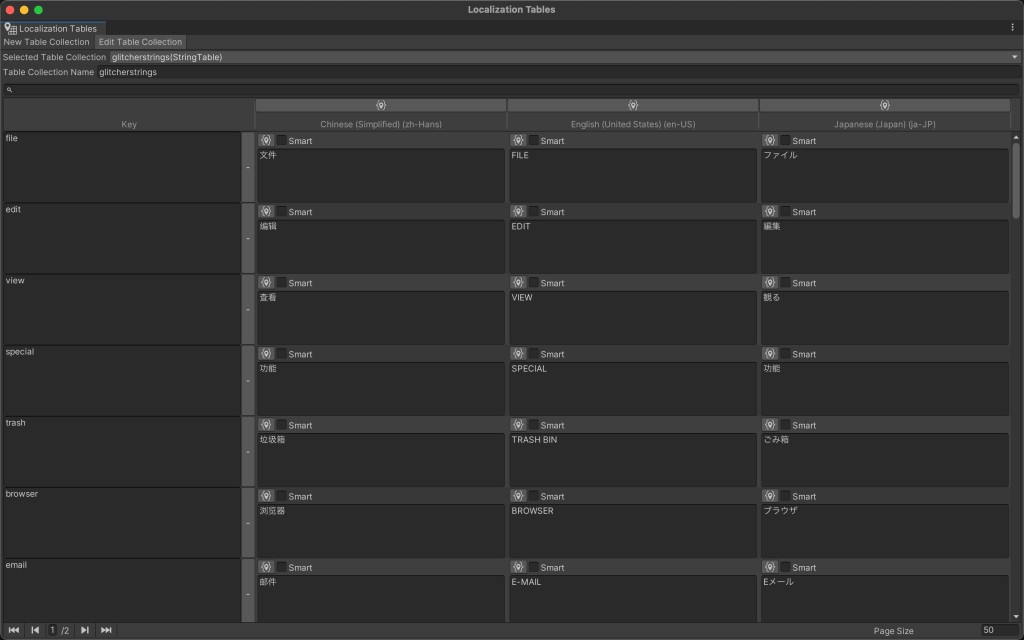
Then, we created a new folder in “Assets” called Localization. We created a Localization Settings.asset in Project Settings and put it in the “Localization” folder. We generated the Locales that we want, and also put the Locales files into the “Localization” folder. Afterwards, we created a “String Table Collection” in the Asset Management ➡ Localization Tables.
And then we were ready to externalize all the strings.
Externalize Strings
After creating the localization table, we were able to externalize the strings in the games.
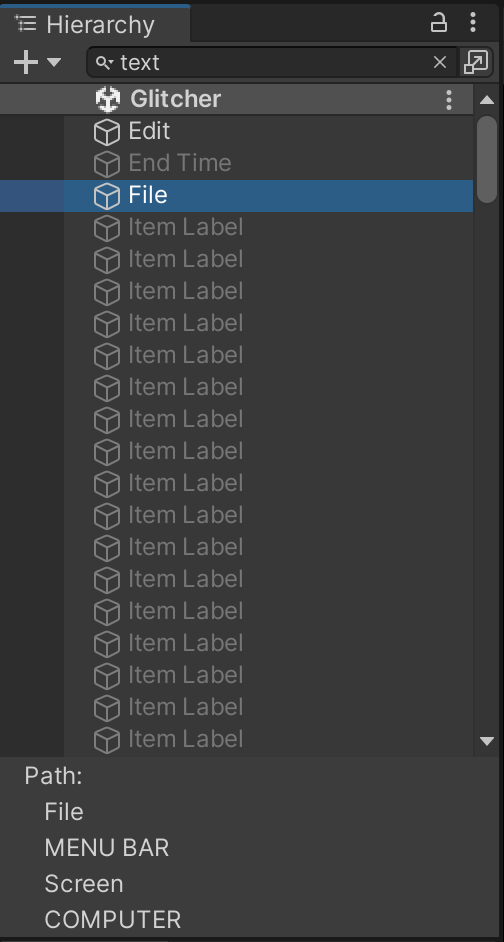
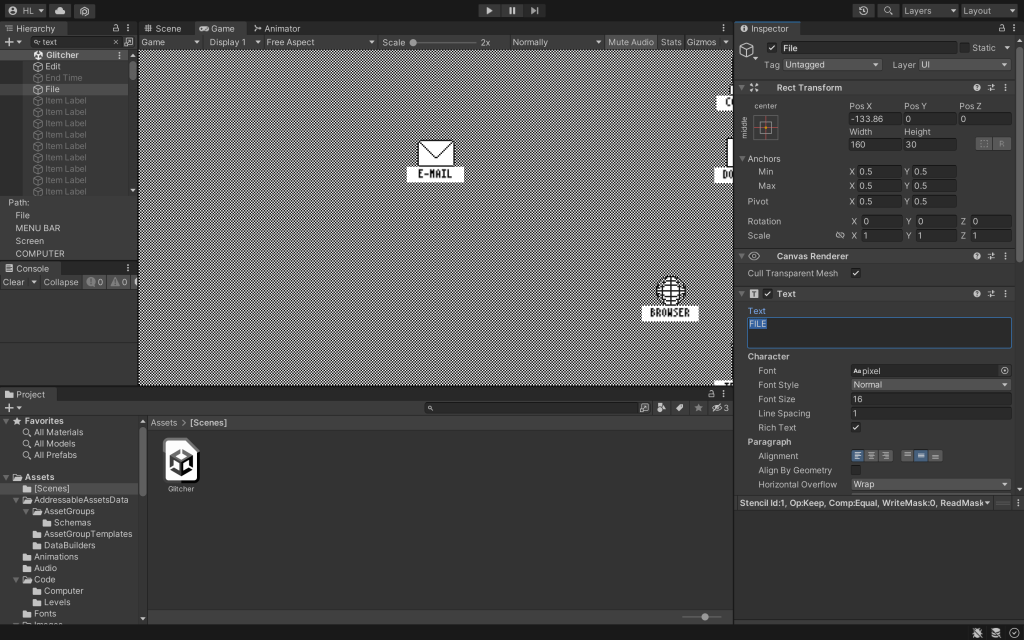
The way to find strings was pretty simple. We just needed to search “text” in Hierarchy, and almost all the properties with text would pops up.
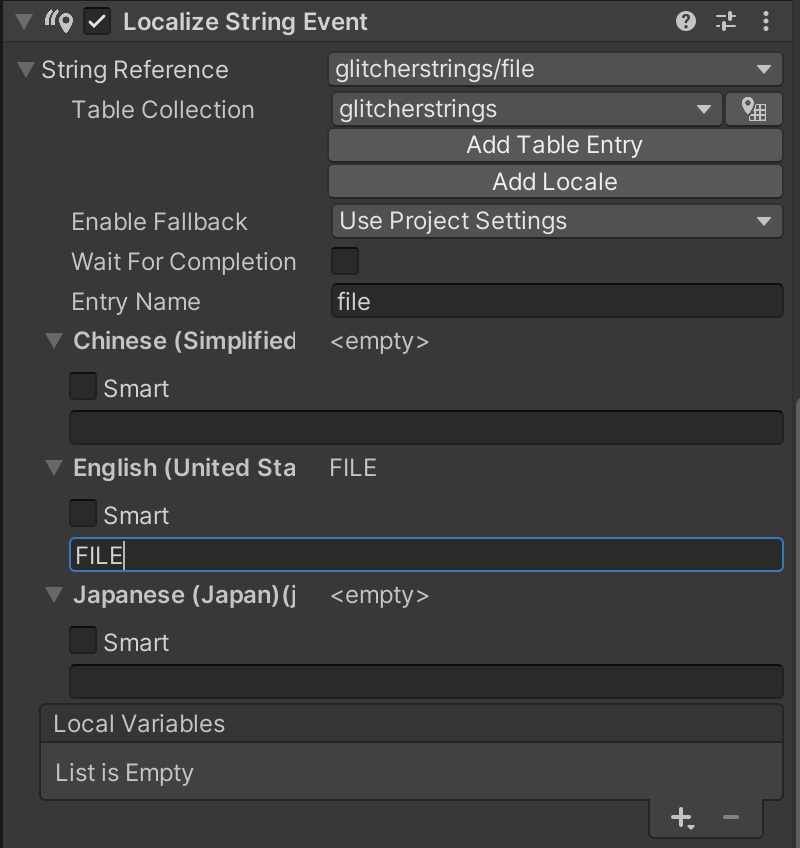
Add Table Entry
In the Inspector, we chose “Add Component”, and then selected “Localize String Event”. In the “Localize String Event” section of the Inspector, we can expand String Reference choose the string table that we created earlier. And then we can “Add Table Entry”. In “Entry Name,” we entered a key and expanded the locales. We put the original content the in English locales.
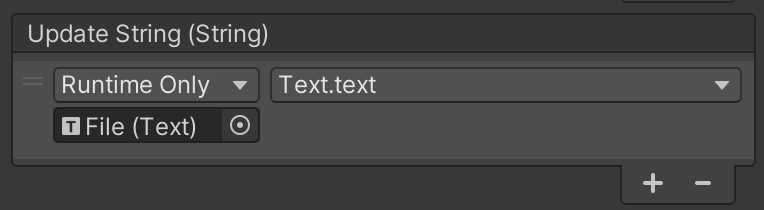
In the “Update String” section, we draged the “text” object into the “Update String” section where it says “None”. Then in the “No Function” section, we chose Text ➡ text.
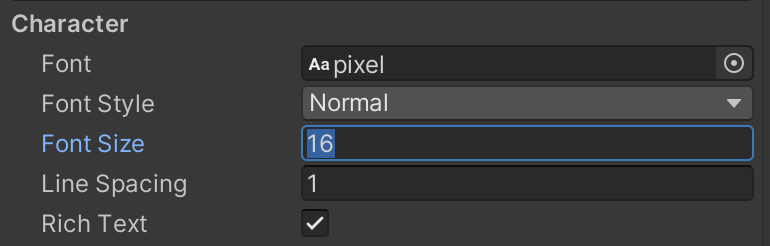
Font
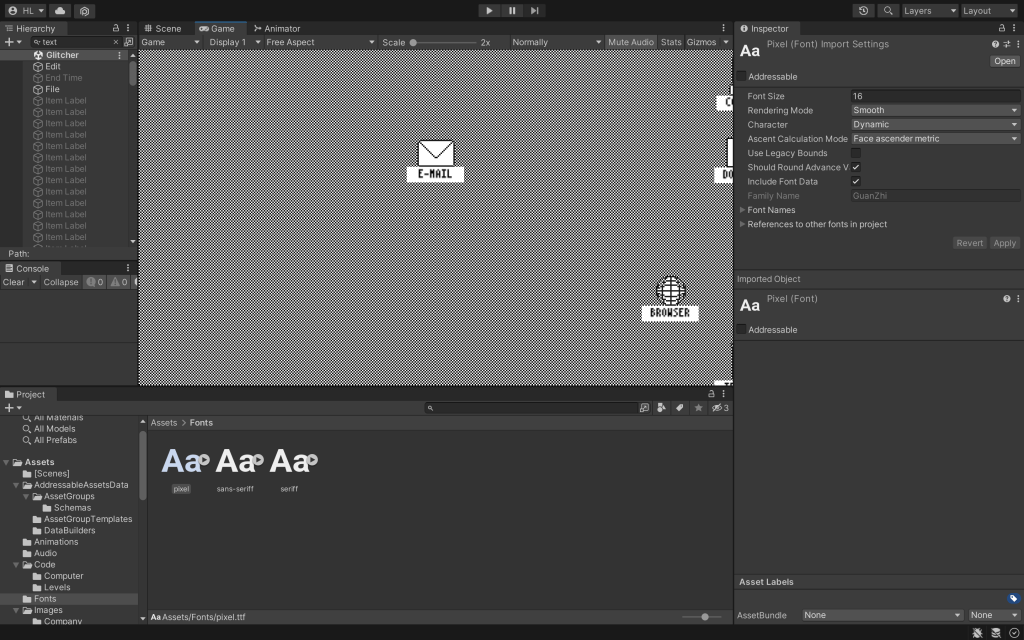
Since the original font doesn’t support CCJK, we will need to replace the font with the pixel.tft. For the font size, we chose 50% of the original size to better match the game image.
Translation
Since this was a group project, so we had different person responsible for externalizing the strings and the translation. So we just added the source language locale and leave the other locales blank.
When the translator translated the files, she first exported and imported XLIFF files in Unity. And then she made further adjustment in the localization table inside Unity.
Project Management
GitHub
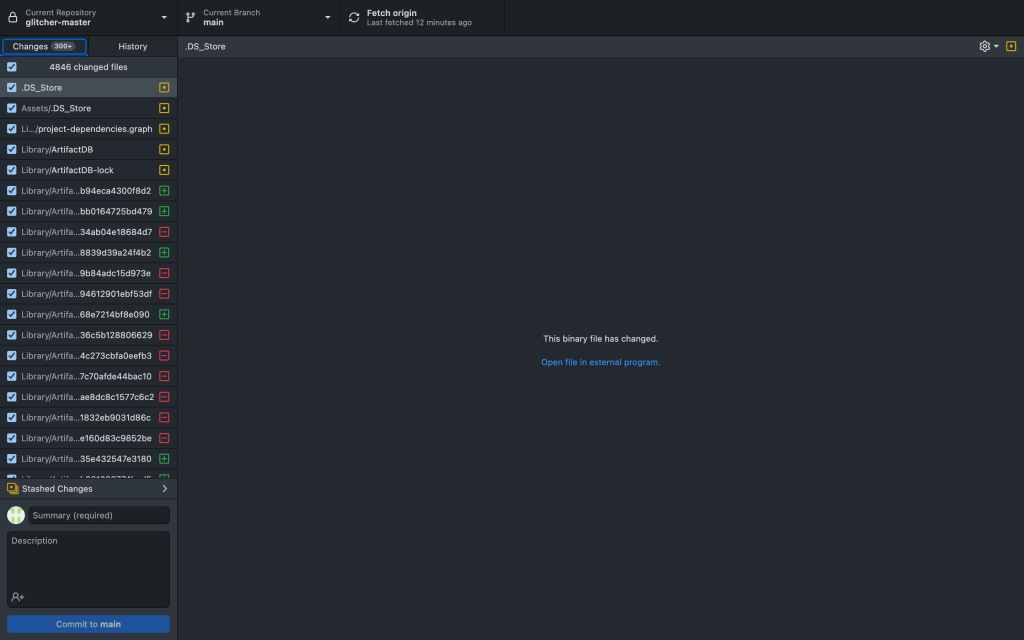
Since this was a group project, it was not practical to complete all the work on one computer. How to ensure the stability and real-time of file transfer becomes a very important issue.
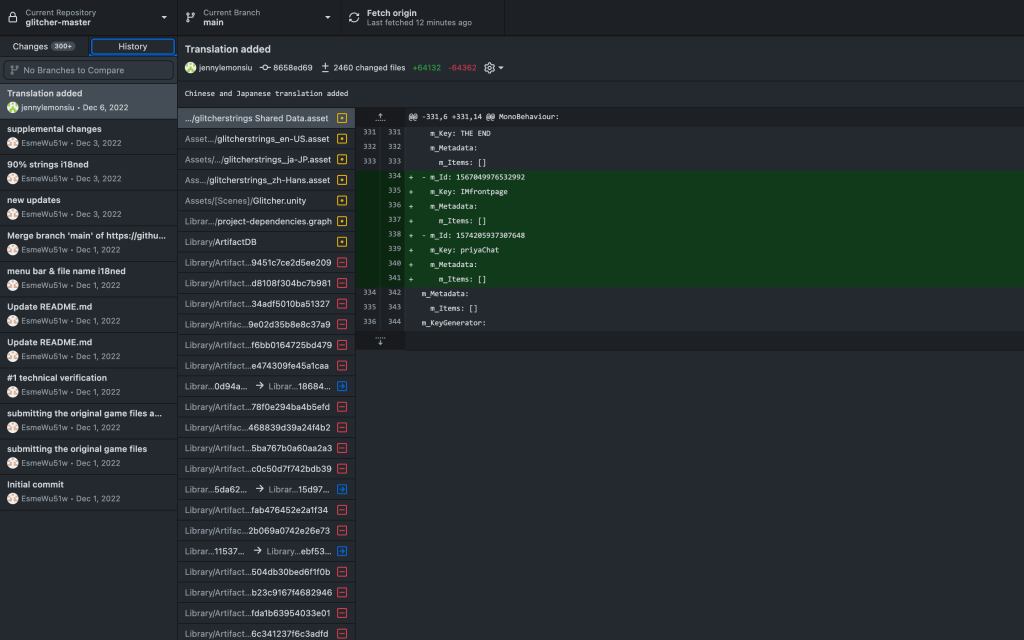
Finally, we chose to use GitHub Desktop to organize our project files. We can use the “Fetch origin” function to cache the files locally. Then after each valid change we make, we can select “Commit to main” to upload the file to the main repository.
And, if someone accidentally uploads the wrong file, we can retrieve the history file, make changes and uploads again.
Unity Editor
To ensure that no additional bugs appear, we decided to use the same editor version, which is 2022.1.22f1.
To install a non-default editor, we need to go to Install Unity Editor ➡ Archive ➡ download archive, find the correct version and download.
Challenge
Dropdown List Localization
When we were externalizing the strings, we were not able to find the text of the dropdown list. So we realized that we were not able to localize the texts in the original way.
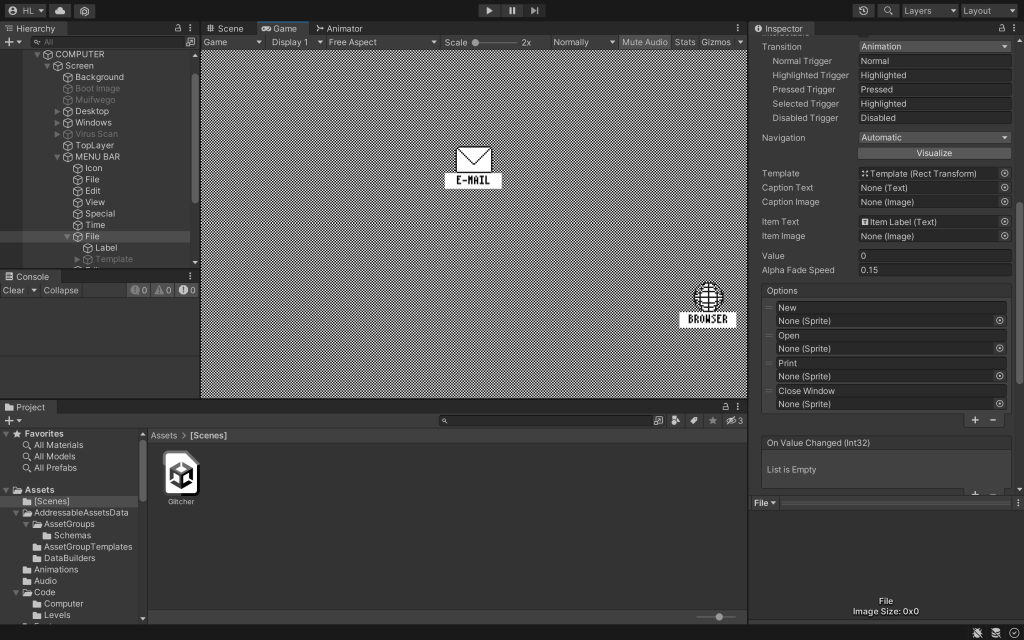
We found some of the texts in COMPUTER ➡ MENU BAR ➡ File ➡ Options, but there is no choice for us to localize the strings.
According to Haoyang, we can enable “Track Changes” in “Localization Scene Controls”, to make the localization function show in Options.
This method is really unstable because it DOSEN’T WORK ON MACBOOK. Haoyang was able to achieve the function on his laptop but we were not able to duplicate the process.
Lessons learned
The one and only lesson I learned in this project:
BUY A WINDOWS COMPUTER
I encountered a lot of challenges this smemster, and most of them related to my laptop. Either the application doesn’t support MacBook or it has less functions on MacBook. So maybe I should give up and embrace Windows…
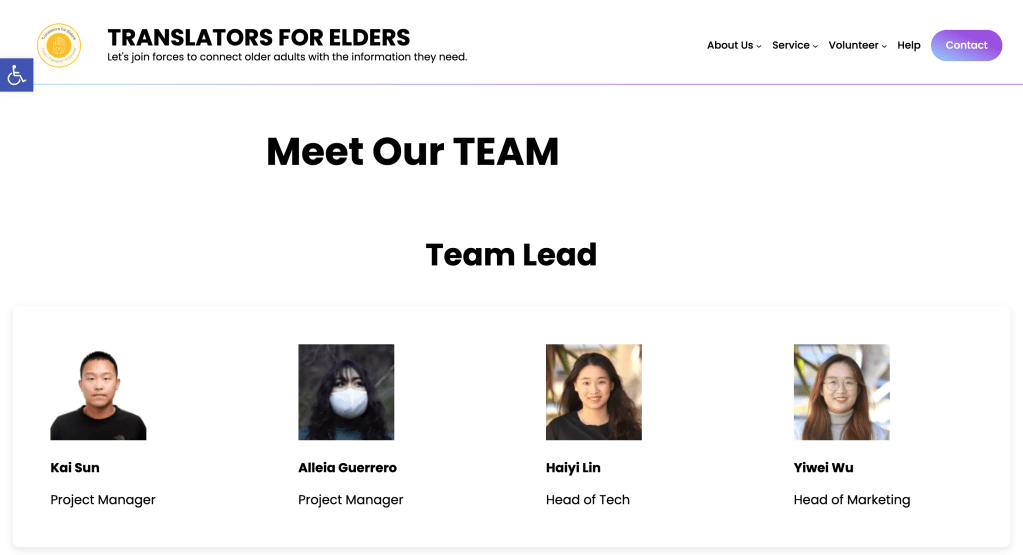
This semester, I have been working as the Head of the Team in Translators for Elders (TFE). This is an unpaid practicum internship with credit-bearing. The internship would be a minimum of 20 hours per week for at least 15 weeks.
Translators for Elders (TFE) is a nonprofit organization started in 2021 in order to connect translation needs with bilingual individuals around the world who can donate their language skills and time. TFE coordinates translation from English into Chinese and Spanish using crowdin.com through communal volunteer support.
Job Description
Managed, assigned, and tracked team projects
Managed and organized team resources using Notion
Designed Standard Operation Procedure and wrote Onboarding Wiki
Hold weekly meetings and organized weekly report
Maintained and ensured that the current website localization process is functioning properly
Performed verifications of continuous localization when the website is updated
Worked with lead linguists to verify the linguistic quality of website localization
General website development, including establishing official email addresses and enhancing UX within the site
Performed accessibility checks periodically and after updates
Worked with the Help Center team, Design and manage the site’s help center
Updated the site regularly with TFE newsletters and other communications as relevant
Maintained the Source Management platform of TFE
Specifications
After working for TFE for the summer break, I have been promoted from Website Localization Engineer to the Head of Tech Team. Managing a team is totally different from just being a small part of the team. When I was just a Localization Engineer, the only thing I needed to care about is one specific task that I was assigned. However, being a program head, I had to take care of all the tasks ongoing. I needed to have a map in mind or on paper to keep track of everything.
We created a strategy plan at the beginning of the semester. Basically, our goals for this semester are to evaluate a new CMS localization integration, choose another theme to make the website look more professional, perform an accessibility check (WCAG) and activate the new function, rebuild the news page, and update the webpage based on the request from different functional team.
These are the tasks that can not be done in a short period, I need to divide each big task into small tasks throughout the whole semester. At the same time, since the localization engineers in the team are working part-time, I need to sincerely consider their workload each week and rank the importance of the tasks. For example, tasks with high priority will be prioritized and will be assigned more resources.
During the whole practicum internship, I feel like I am getting close to my designed career path. After graduating from Middlebury, I would try to apply for vendor-side companies like RWS, TransPerfect, or client-side companies like Google, and Meta for positions such as localization Engineer, Linguistic QA Tester, Localization Project Manager, and the like.
The reason why I work as the Head of Tech Team for Translation for Elders is that TFE offers a wide range of practice opportunities for me and website localization is a very popular field in the localization market. Therefore, I would like to enrich my knowledge and experience by participating in projects related to translation technology and website localization this semester.
Time Tracking
Most of the time we were editing the website and managing resources. We spent some time meeting to conclude what we did last week and assign the tasks for next week. And we also spent some time on documentation to fill out the weekly report and follow each teammate’s progress.
Progress
Webpage Function Research
This semester, our main task is to Evaluate CMS localization integration, choose another theme to make the website look more professional, perform accessibility check (WCAG) and function (plug-in), and rebuild the news page.
Therefore, it’s necessary to make some research before we make any changes.
JS Proxy or WPML
From what we have tried on TFE’s page, we consider WPML to be a really powerful tool. In fact, given the reason that we don’t use JS Proxy method so often, we found WPML is somehow much easier to use. The translatable content approved by WPML includes pages, posts, and the navigation menu. The taxonomy translation allows us to translate categories and tags. We didn’t have enough courage to play with “Theme & Plugins Localization”, as we didn’t know what would happen to our production site. We are trying to make a staging site so I can further explore the WPML.
In terms of collaborating with Crowdin, we didn’t try anything with the TFE site using WPML. However, from my past experience, the two can work well with each other.
For JS Proxy, we tried to create a project on crowdin:
It is basically the same as how WPML works. Hence, the only thing we think we need to consider is which one works better with accessibility plugin tools. Based on our research on accessibility tools for now, WPML is mentioned and demonstrated more often. So we could go with WPML in this sense.
Accessibility plug-in research
Checking tool – Accessibility Insights for Web
WP Accessibility A free plugin with a variety of common accessibility problems in WordPress themes.
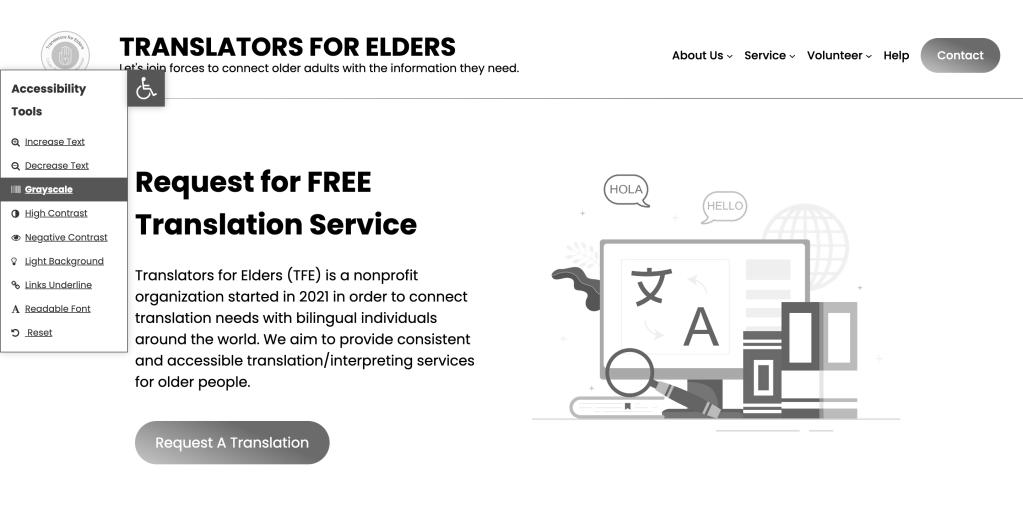
One Click Accessibility A free plugin that allows users to:
Resize font (increase/decrease)
Grayscale
Negative Contrast
High Contrast
Light Background
Links Underline
Readable Font
Link to Sitemap / Feedback / Help pages
Not only does it help websites to be more accessible, but more international SEO friendly as well. The free version supports WPML!
WP Accessibility Helper The paid version supports WPML.
We think One Click Accessibility seems to be the best option right now since we are doing multi-language websites.
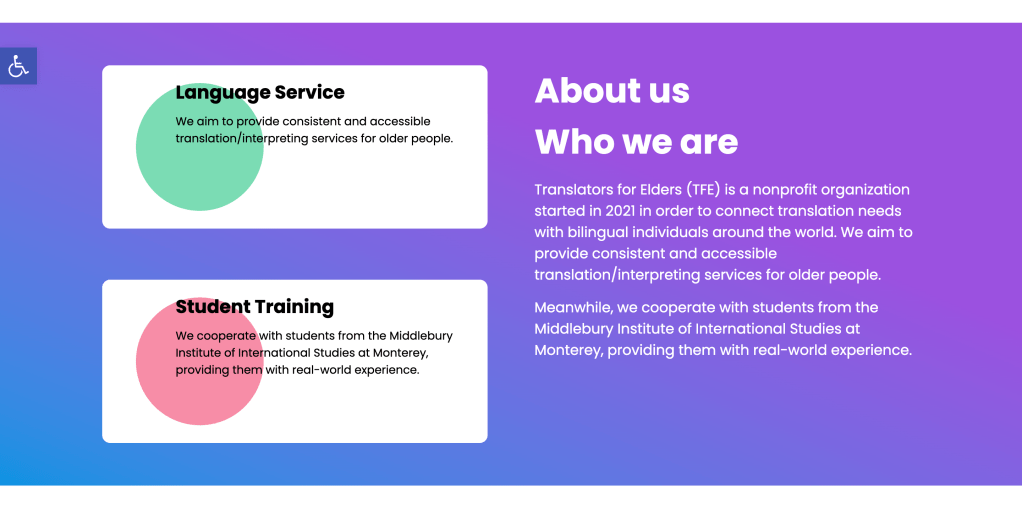
Theme Update
After researching the new themes, we decided to move forward to the new theme that comes from the same company as Aeonium.
Currently, we have finished editing the home page. But there is still a lot of room to adjust and make further changes.
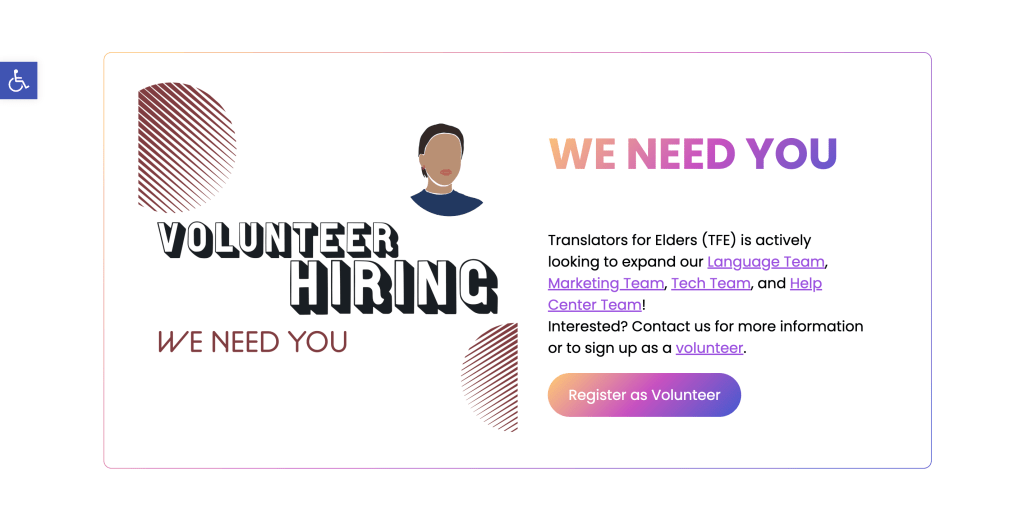
Hiring PageUpdate
We updated our hiring page to adapt to the new theme.
Next semester, our main task will be to localize this website into two languages: Simplified Chinese and Spanish.
Through our previous research, we have selected the plugins we need. Now we are waiting for the language team to translate it. Once the site translation is complete, we can update the site to multiple languages and add language switchers
For this project, my colleague Yiwei Wu, Jocelyn Kwong, Bahna Miller, and I decided to try out hands at localizing an open-source C# game Top Down Car Racing into Chinese and French.
The coding language we used is C#. Specifically, we will use the Windows form and Resource file to localize the game.
The following is our I18N & L10N process:
Localization Check
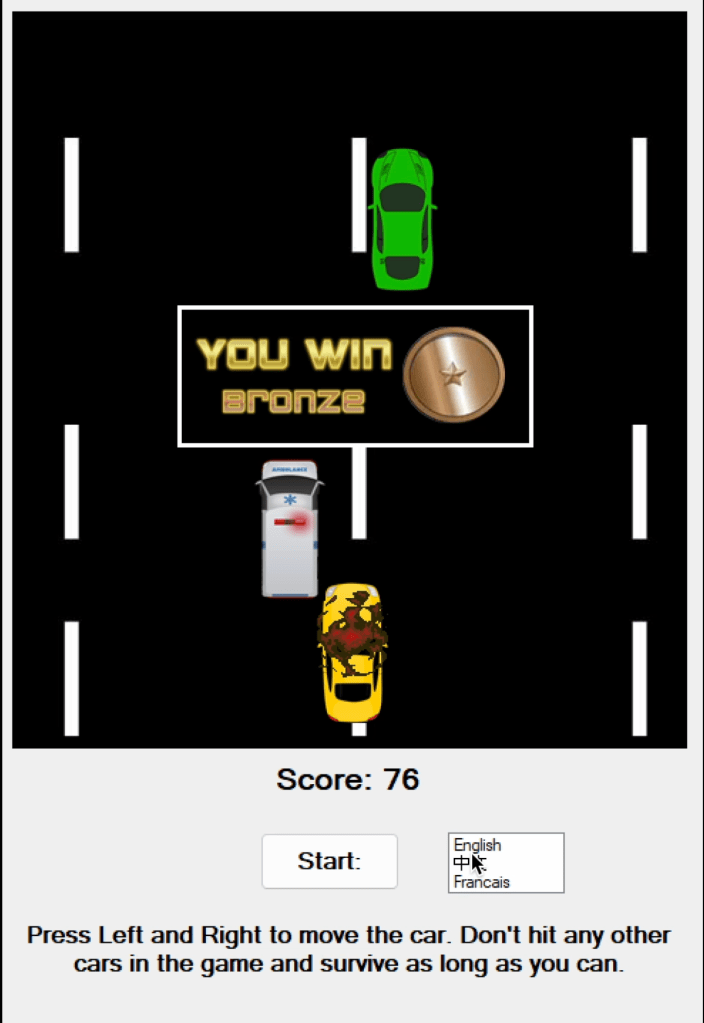
There is some GUI overlay text and some instruction text in the game for us to externalize.
Meanwhile, there are 3 PNG files for us to do Desktop Publishing (DTP) in Photoshop.
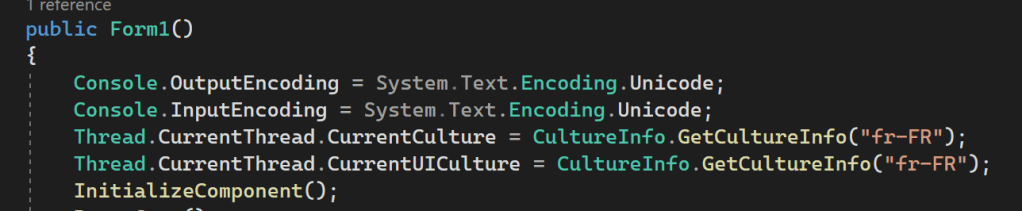
Globalization Function
To add a function that enables globalization, we decide to use the code that we learned in class, which is
using System.Globalization;

using System.Threading;

Console.OutputEncoding = System.Text.Encoding.Unicode;

Console.InputEncoding = System.Text.Encoding.Unicode;

Thread.CurrentThread.CurrentCulture = CultureInfo.GetCultureInfo("fr-FR");

Thread.CurrentThread.CurrentUICulture = CultureInfo.GetCultureInfo("fr-FR");
We added this code to the main class of Form1.cs file. The language of the game could be changed when we change the language code inside the bracket. For example, fr-FR and zh-TW.
DTP
We did Desktop Publishing (DTP) with Photoshop. There are 3 images in total required DTP.
The difficulty of DTP is that we need to apply the Blending option. Meanwhile, we have to choose the right color to ensure that the gradient is similar to the original image.
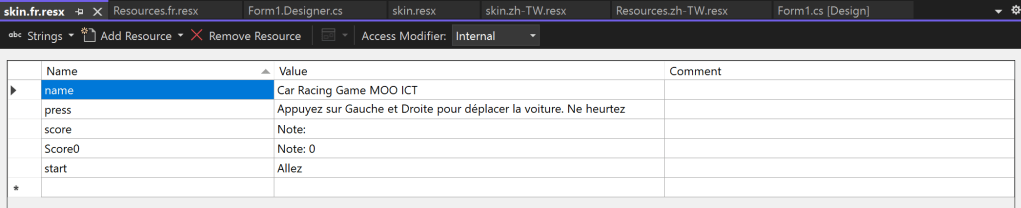
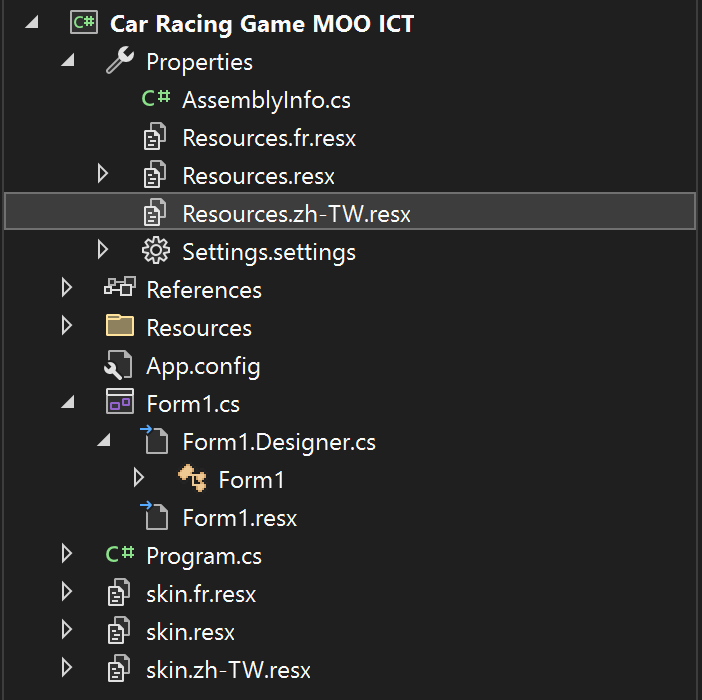
Resource File
Text
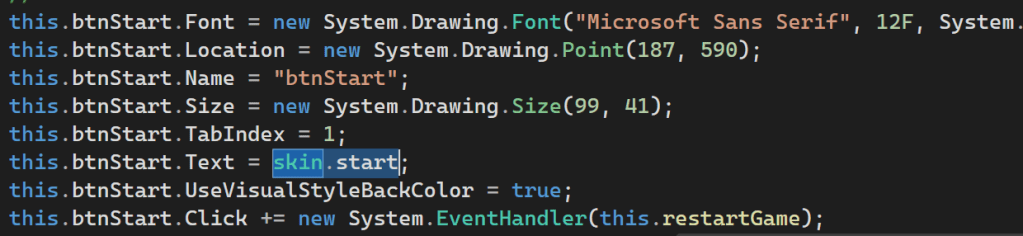
We used skin.string to externalize all the strings and input them into the Text Resource File.
Then, we add resource files for each language to enable localization.
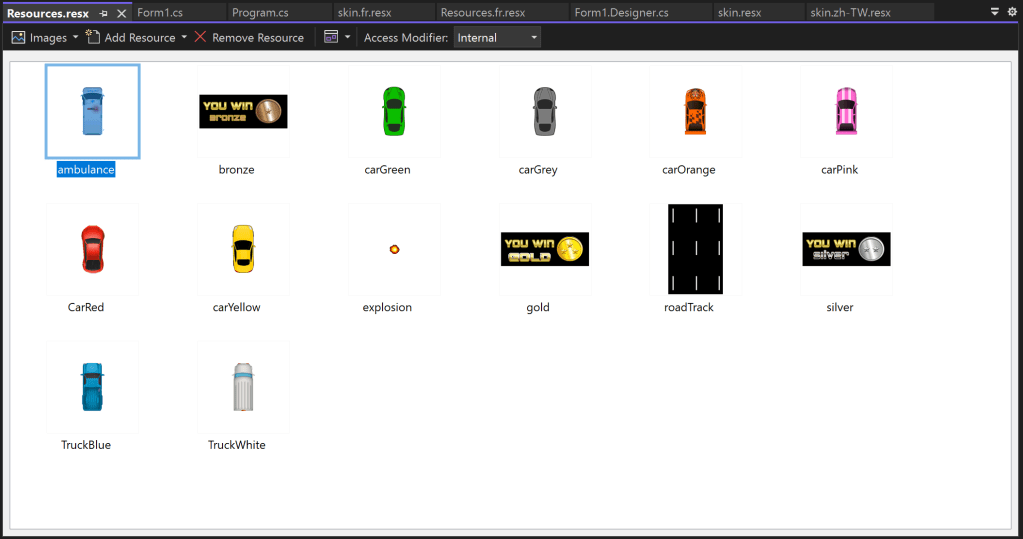
Image
For Image Resource File, there is already a file for image resources, so we don’t need to find the code that introduces the image but just add related Image Resource Files.
There are two things needed to be noted. One is the location of the resource file. Another is the path of the images.
Location of the Resource File
At first, we were confused by the location of the Image Resource File. We put the Image Resource File in the same location as the Text Resource File, but it didn’t work.
In the end, we figured out that the Image Resource Files should be put under the Properties folder.
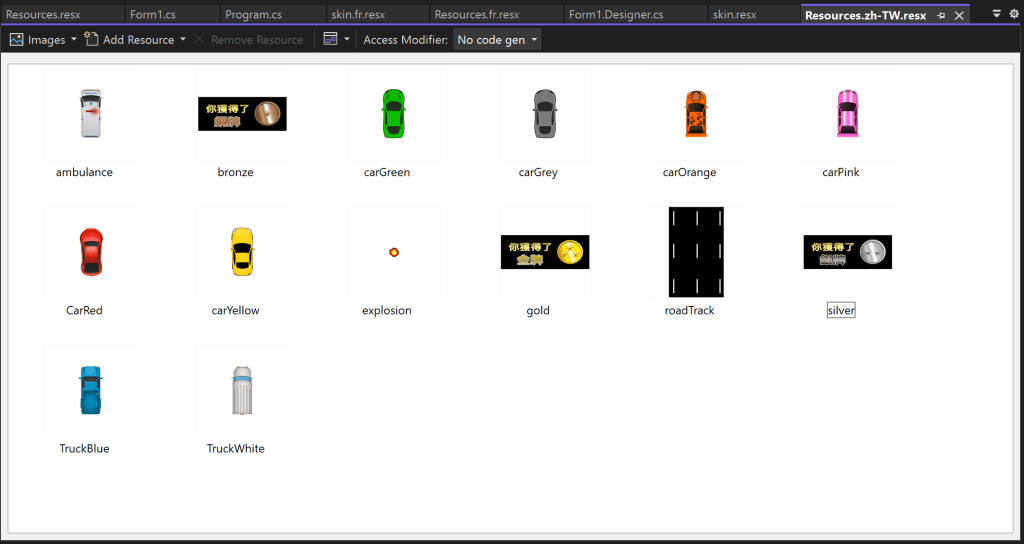
Path of the Images
At first, we just copy and paste the images from the resource file into another resource file. This resulted in a duplicate file name that could not be matched with the code.
In the end, we figured out that we should first import the images to the Resources folder. And then, we should copy and paste them to the Image Resource Files. Then, we need to change the image name to make it make the coding.
Challenges
I18n error: odd concatenation
One difficulty we met in externalizing the strings is that there is a sentence split in half. Meanwhile, it has an odd concatenation like “\r\n\r\n”. There is another possible problem is text expansion since the sentence was split into two separate lines.
The solution to this problem is to remove all the connectives and join the broken sentences into one complete sentence. Surprisingly, this method actually works. The Text Expansion we were worried about before didn’t happen either. Sentences will be automatically line-wrapped because the size of the Text Box is set in the WinForm’s Design page.
String that contains variables
The text “Score: ” is linked to a game timer. We could not externalize the string for the Score without breaking the game.
The solution is to split the text and the variable and translate only the string.
Language Switcher Attempt
We tried to add a language switch to the game. We tried Radio Buttons, Listbox, and Dropdown List.
We managed to implement the language-switching feature, but one fatal problem is that the game’s shortcut keys are the same as List Box’s. When we press the left and right buttons, we can only toggle the List Box options, but not the car. And, we don’t know how we should change the shortcut keys of the car or List Box.
So, we finally gave up this attempt.
Lesson Learned
The one and only lesson I learned in this project:
BUY A WINDOWS COMPUTER
As a MacBook owner, I was deeply humiliated by Visual Studio in this project since the WinForm designer page didn’t show, even though I used the virtual machine.
For this project, all of the group members gathered together and used one computer to finish all the work. That’s not really an efficient way to finish a group project. So let us just buy a WINDOWS COMPUTER.
This portfolio includes the NMT Training Project and the TMS Project.
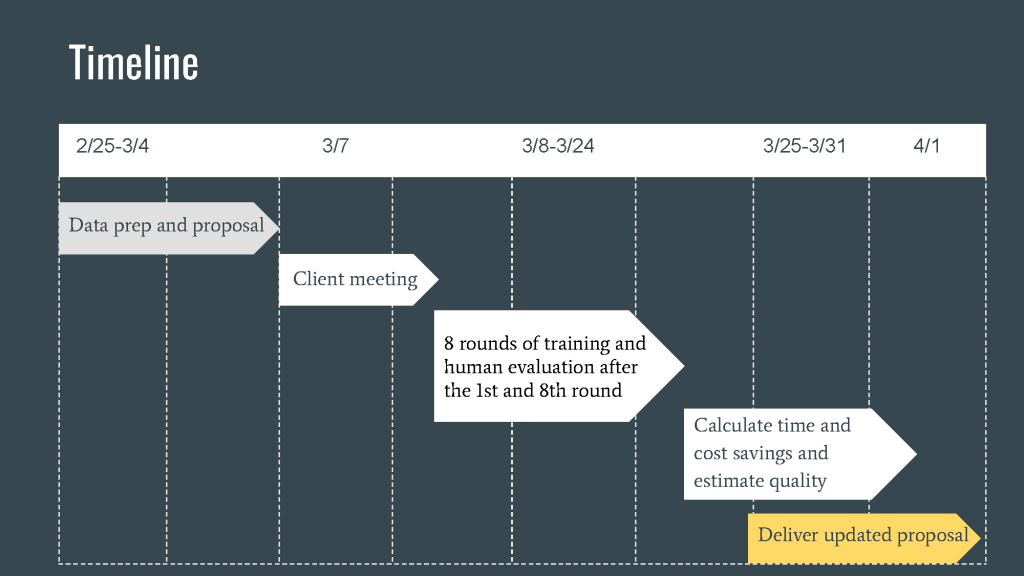
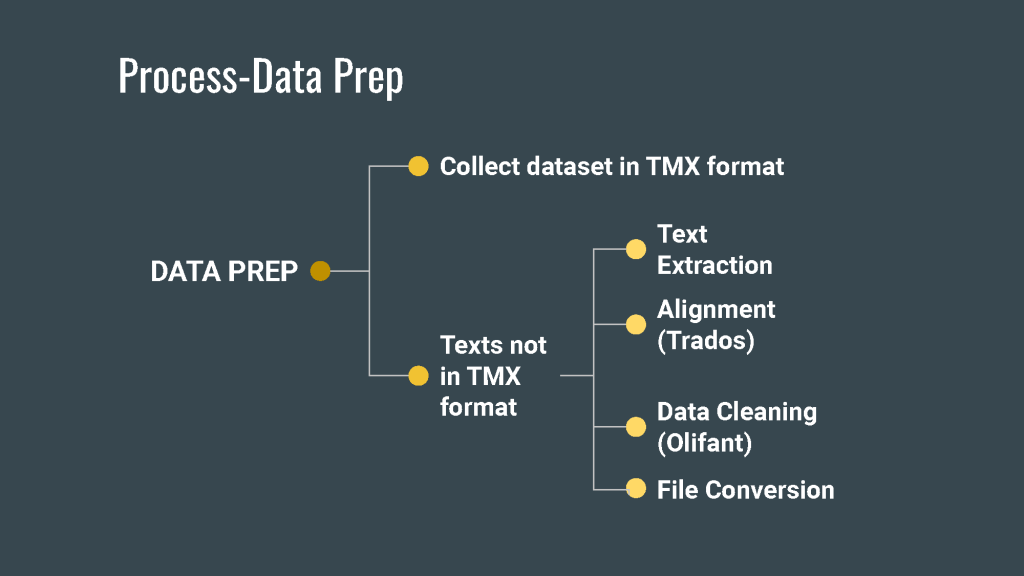
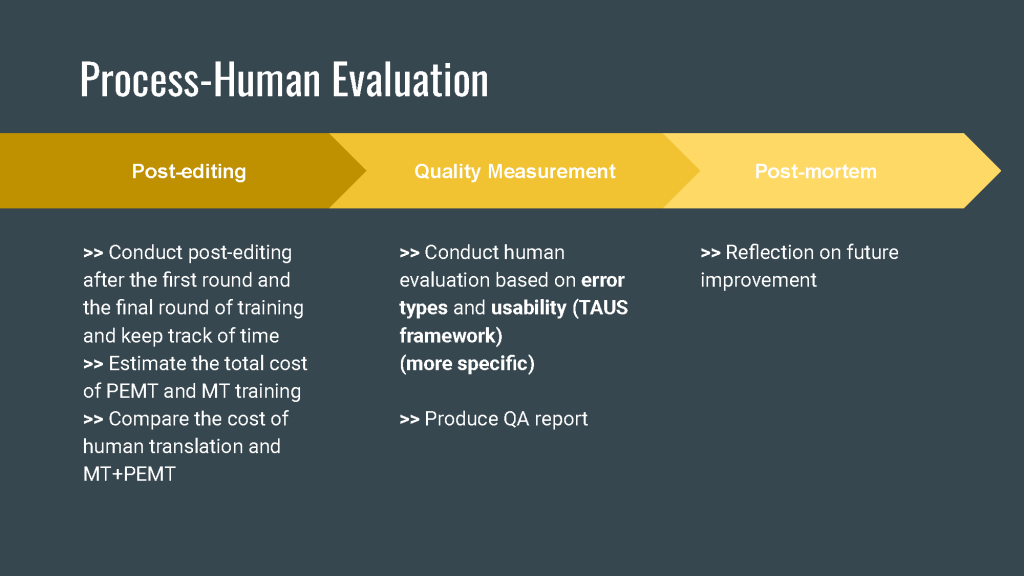
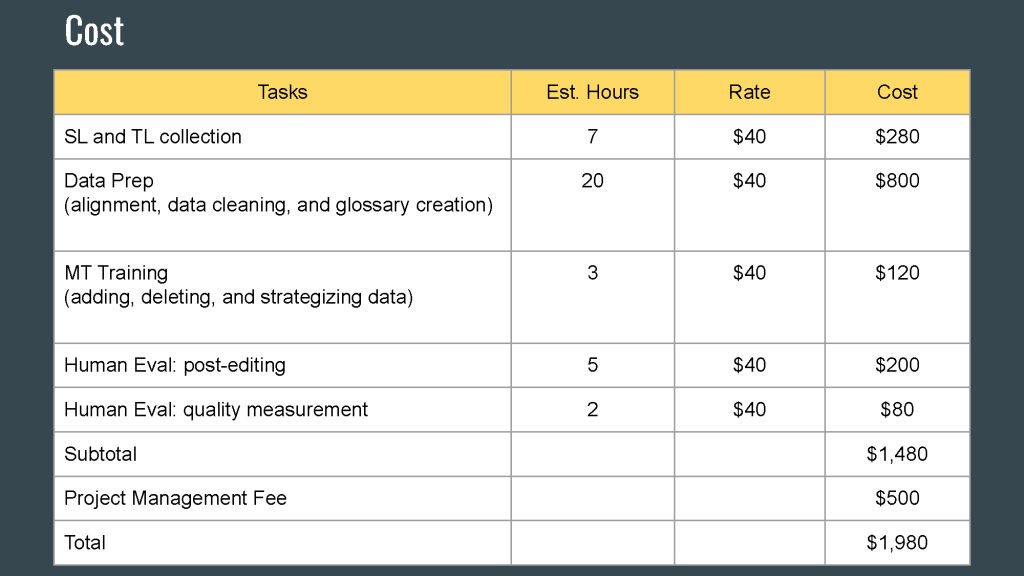
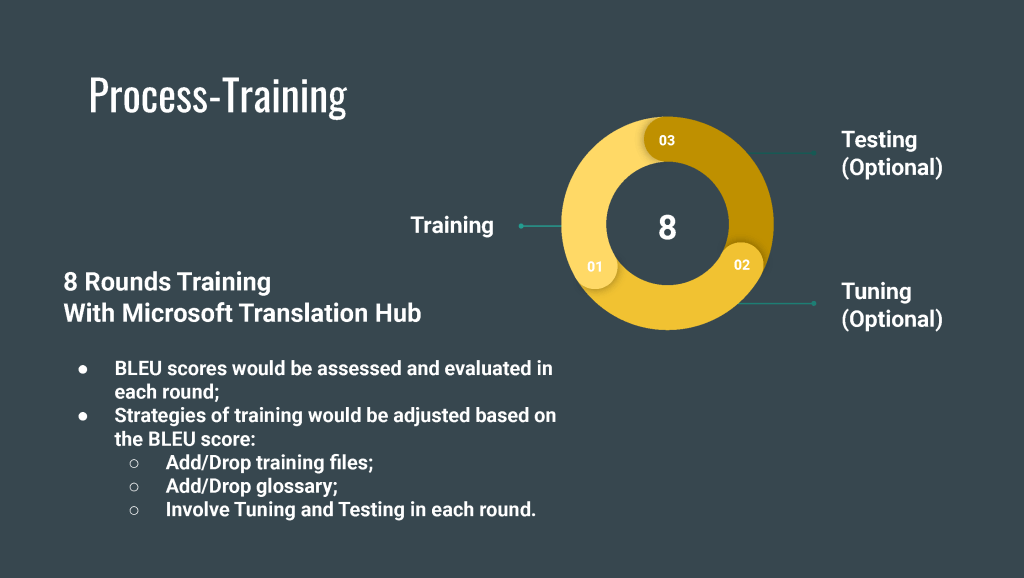
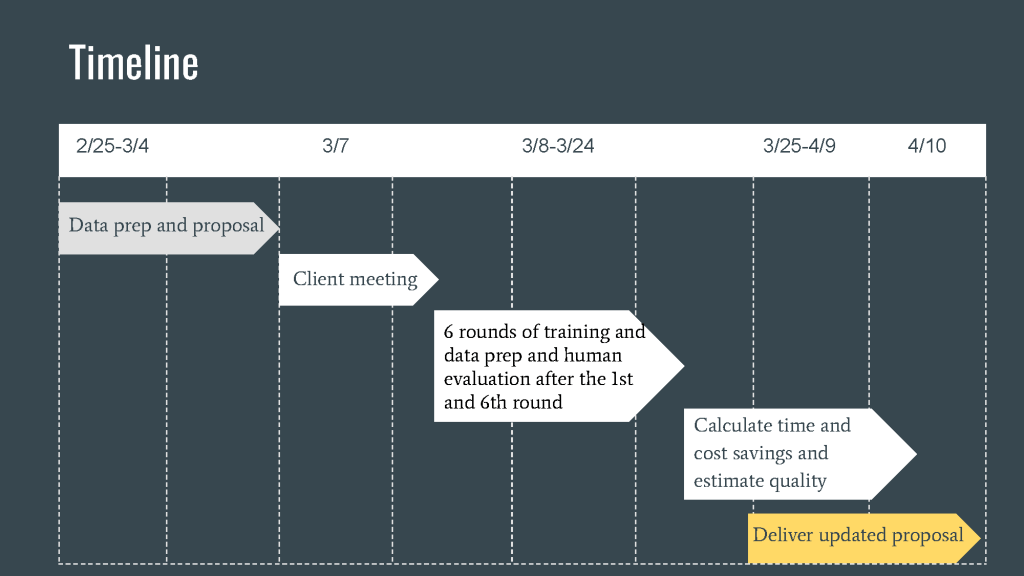
NMT Training Project
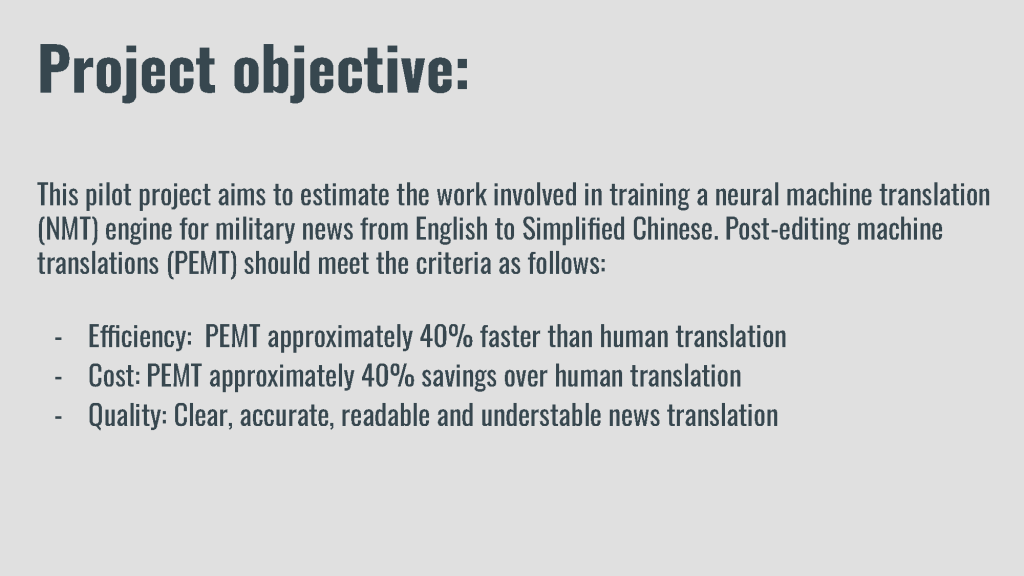
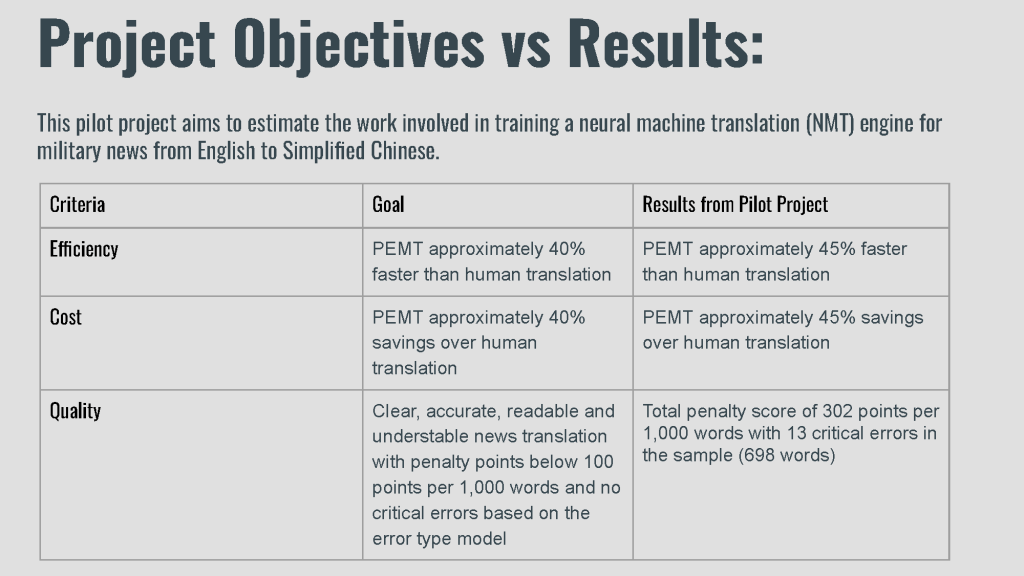
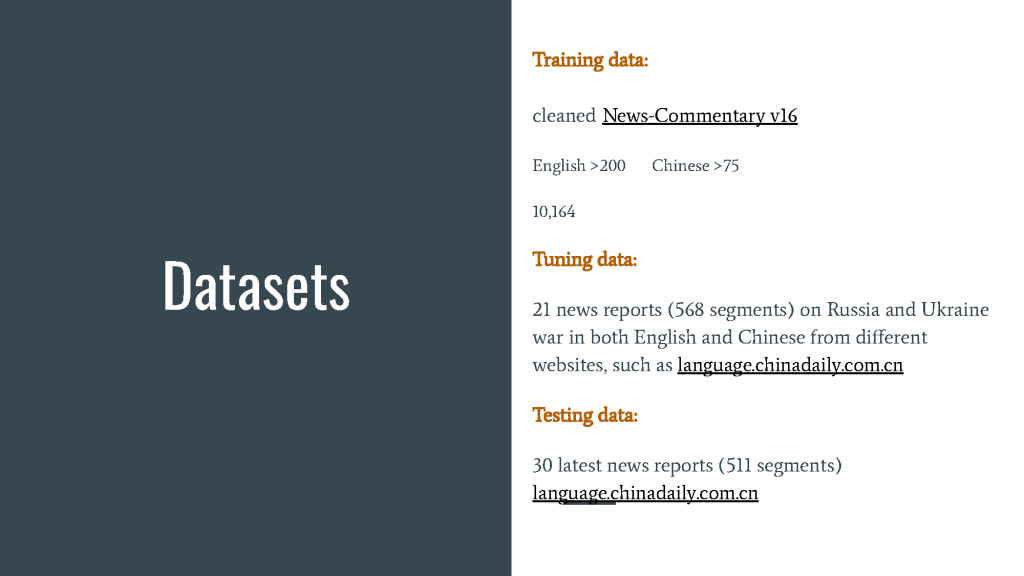
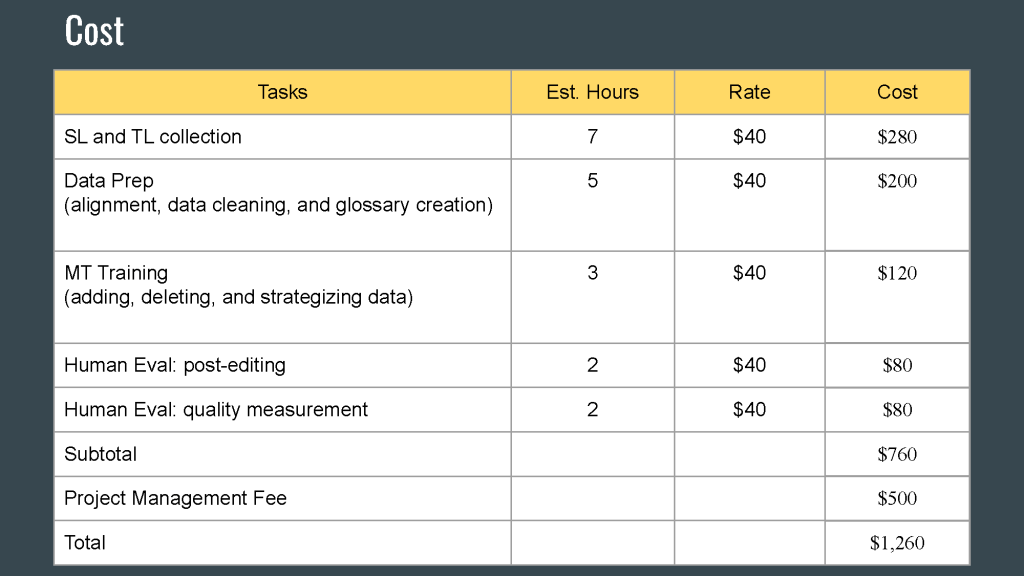
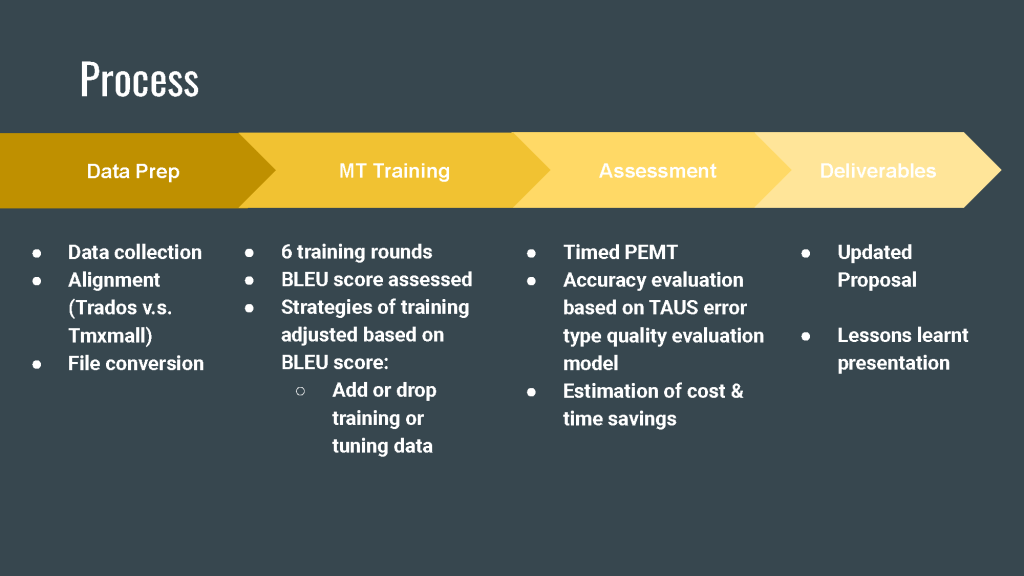
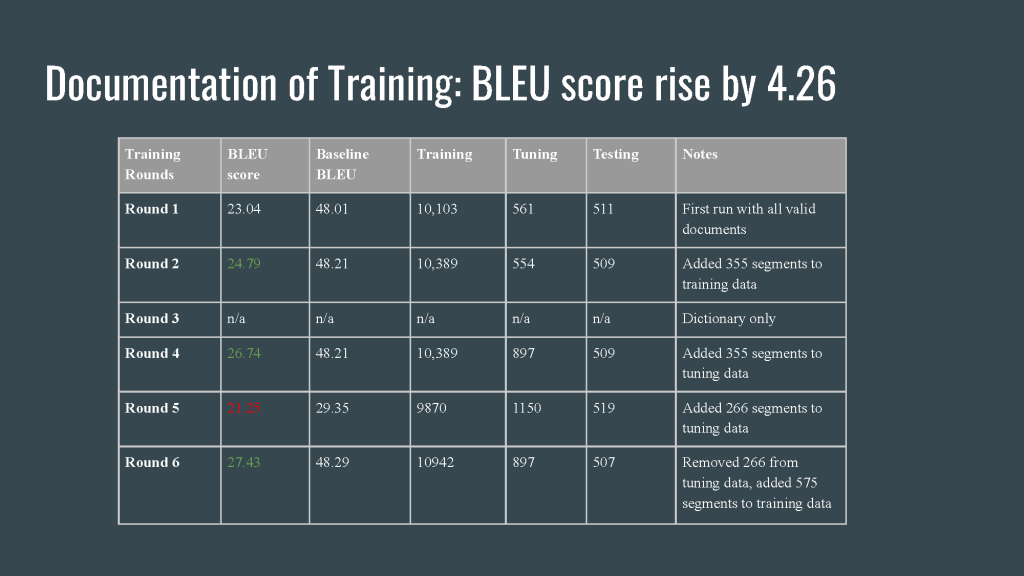
This pilot project aims to estimate the work involved in training a neural machine translation (NMT) engine for military news from English to Simplified Chinese.
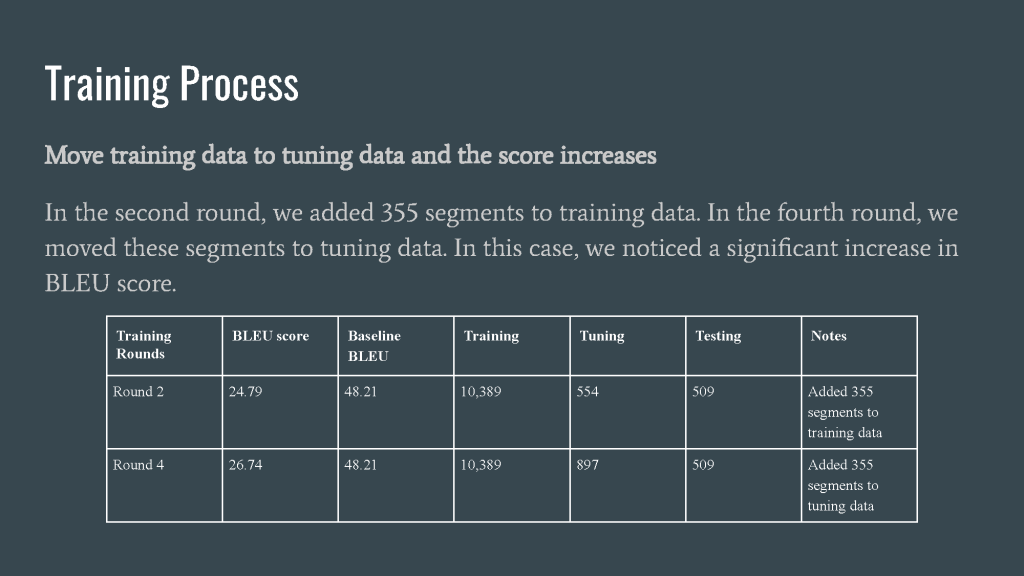
After the training, our BLEU score rise by 4.26, which is a promising result.
Proposal
Updated Proposal
Lesson Learned
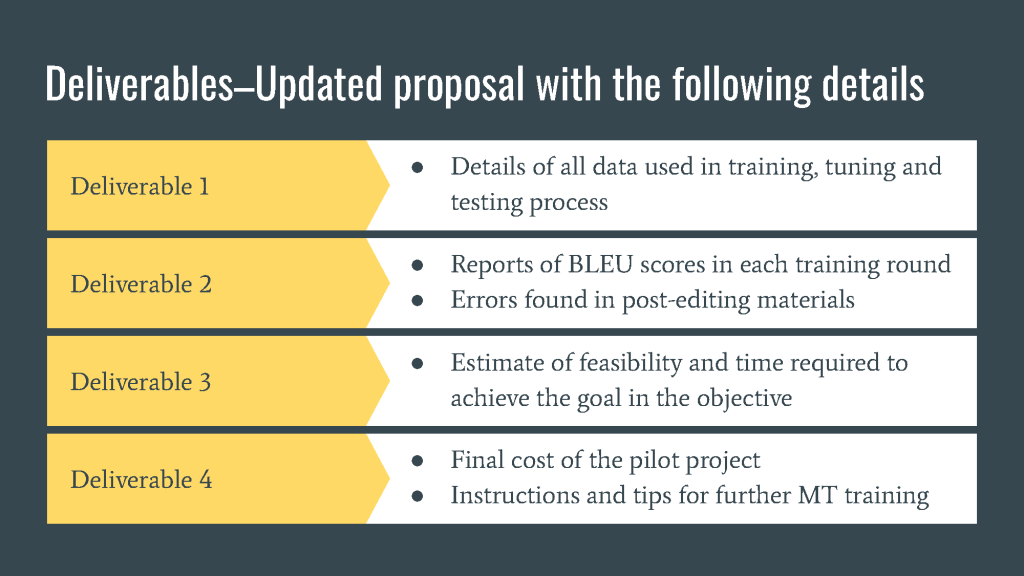
Deliverables
Here is the link to the Deliverables of our project. Please feel free to download.
TMX Project
For TMX Project, we selected American Red Cross as our client. And we compared two TMX platforms for ARC, which are SmartCat and XTM.
American Red Cross is a nonprofit organization that aims to help all in need regardless of language through its strong network of volunteers, donors, and partners.
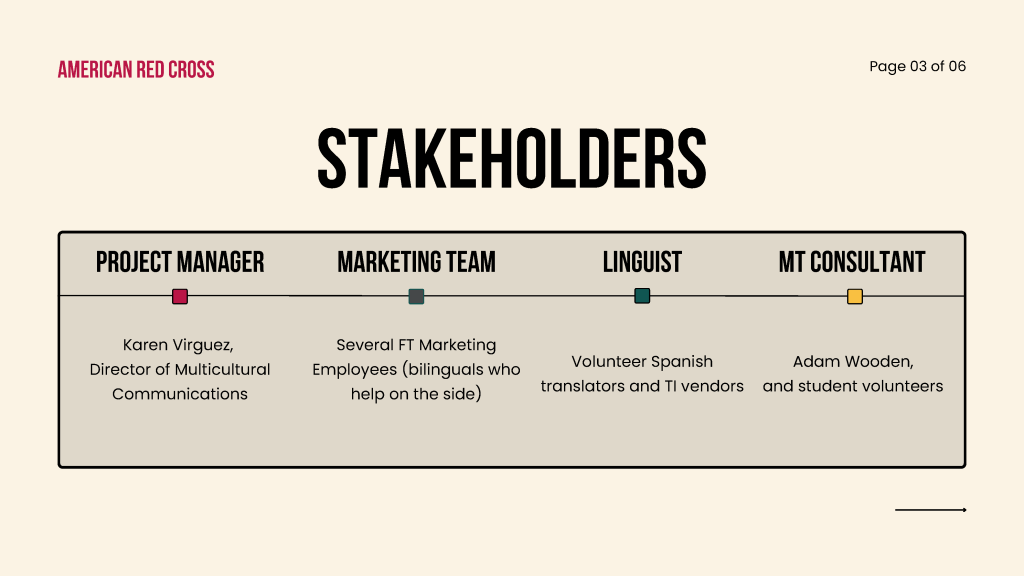
For our stakeholders, we have four sets. The first one is our project manager Karen. She’s the director of multicultural communications. The second one is our marketing team. We have several full-time marketing employees. All of them are bilingual and help on the site. The third one is our linguist. They are Spanish translator volunteers and TI vendors. The last one is the MT consultant, basically is Adam Wooden, and student volunteers.
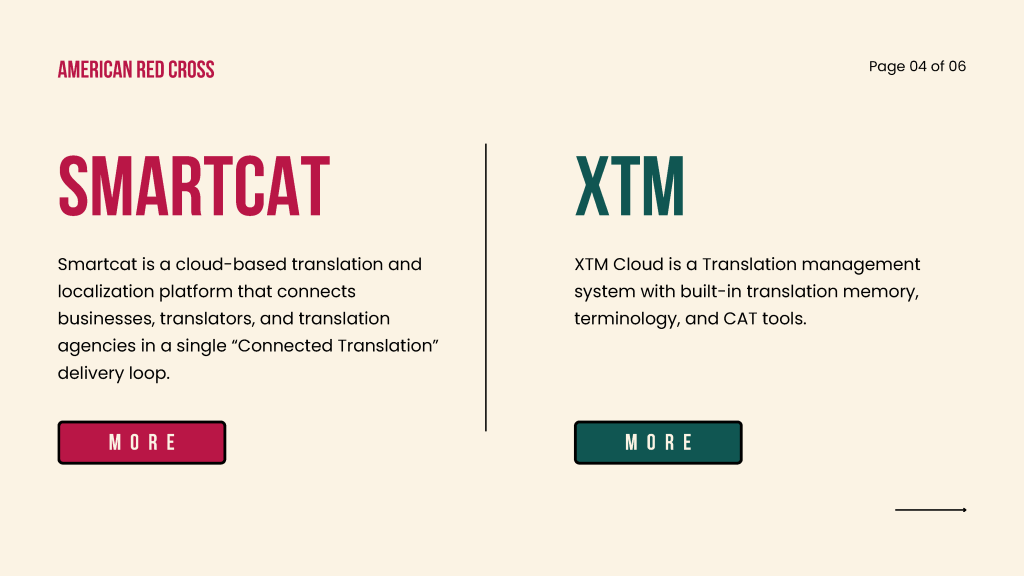
So we will analyze two TMX platforms, SmartCat and XTM. SmartCat is a cloud-based translation and localization platform that connects businesses, translators, and translation agencies in a single connected translation delivery loop. For XTM, XTM Cloud is a translation management system with built-in translation, memory, terminology, and CAT tools.
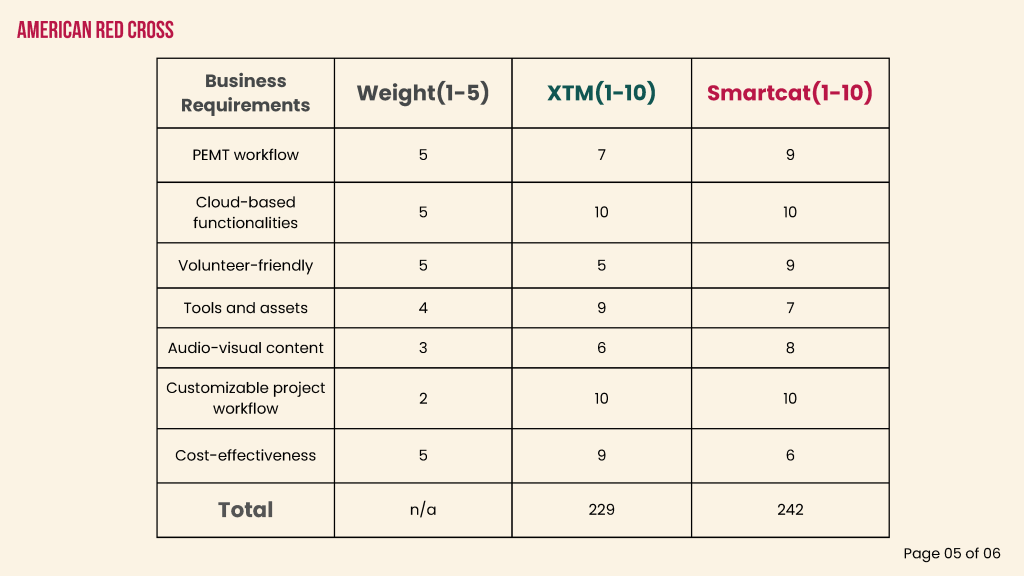
This is a scoreboard for seven key business requirements. We give them weight points to prioritize the seven requirements, and we have a score for both XTM and SmartCat.
For PEMT workflow, we think it is relatively important because our project requires training our MT, so we think that our workflow is basically PEMT. That’s why it’s important. For XTM, it supports most MT integration and custom MT. However, we need to purchase MT APIs instead. And it only supports SYSTRAN in the Free version. However, SmartCat supports custom MT, and different MTs are included in the free plans with limited words. After comparison, we think that SmartCat is more suitable for PEMT workflow. That’s why we give SmartCat 9 points and XTM 7 points.
For our Cloud-based functionalities, both platforms are cloud-based platforms. So we gave the full 10 points for both platforms.
In terms of Volunteer-friendly, both platforms have good instructions. However, SmartCat is definitely simpler and prettier with UI and intuitive creatures.
By Tools and assets, we refer to TM and TB. XTM outperforms SmartCat because SmartCat has this unique feature of smart words with charges for TM.
In terms of Audio-visual content, both platforms support in-context reviews of videos. And we think the American Red Cross might need videos for marketing. But XTM only has a beta version and is not mature enough. However, SmartCat has a relatively mature subtitling tool. So it has two more points than XTM.
And in terms of Customizable project workflow, both platforms have workflow templates and support customization for workflow. So they achieved full points for this requirement.
And the last part is Cost-effectiveness. It is relatively complicated. And after some complex calculations, we figured that SmartCat charges around $1,500 more than XTM per year, which means that XTM may be more cost-effective. However, for a more accurate calculation and conclusion, we need to know the specific translation workload and numbers of users of the American Red Cross.
In total, XTM has 229 points and SmartCat achieved 242 points. Therefore, in conclusion, we think SmartCat would be a better option for American Red Cross as their TMX platform.
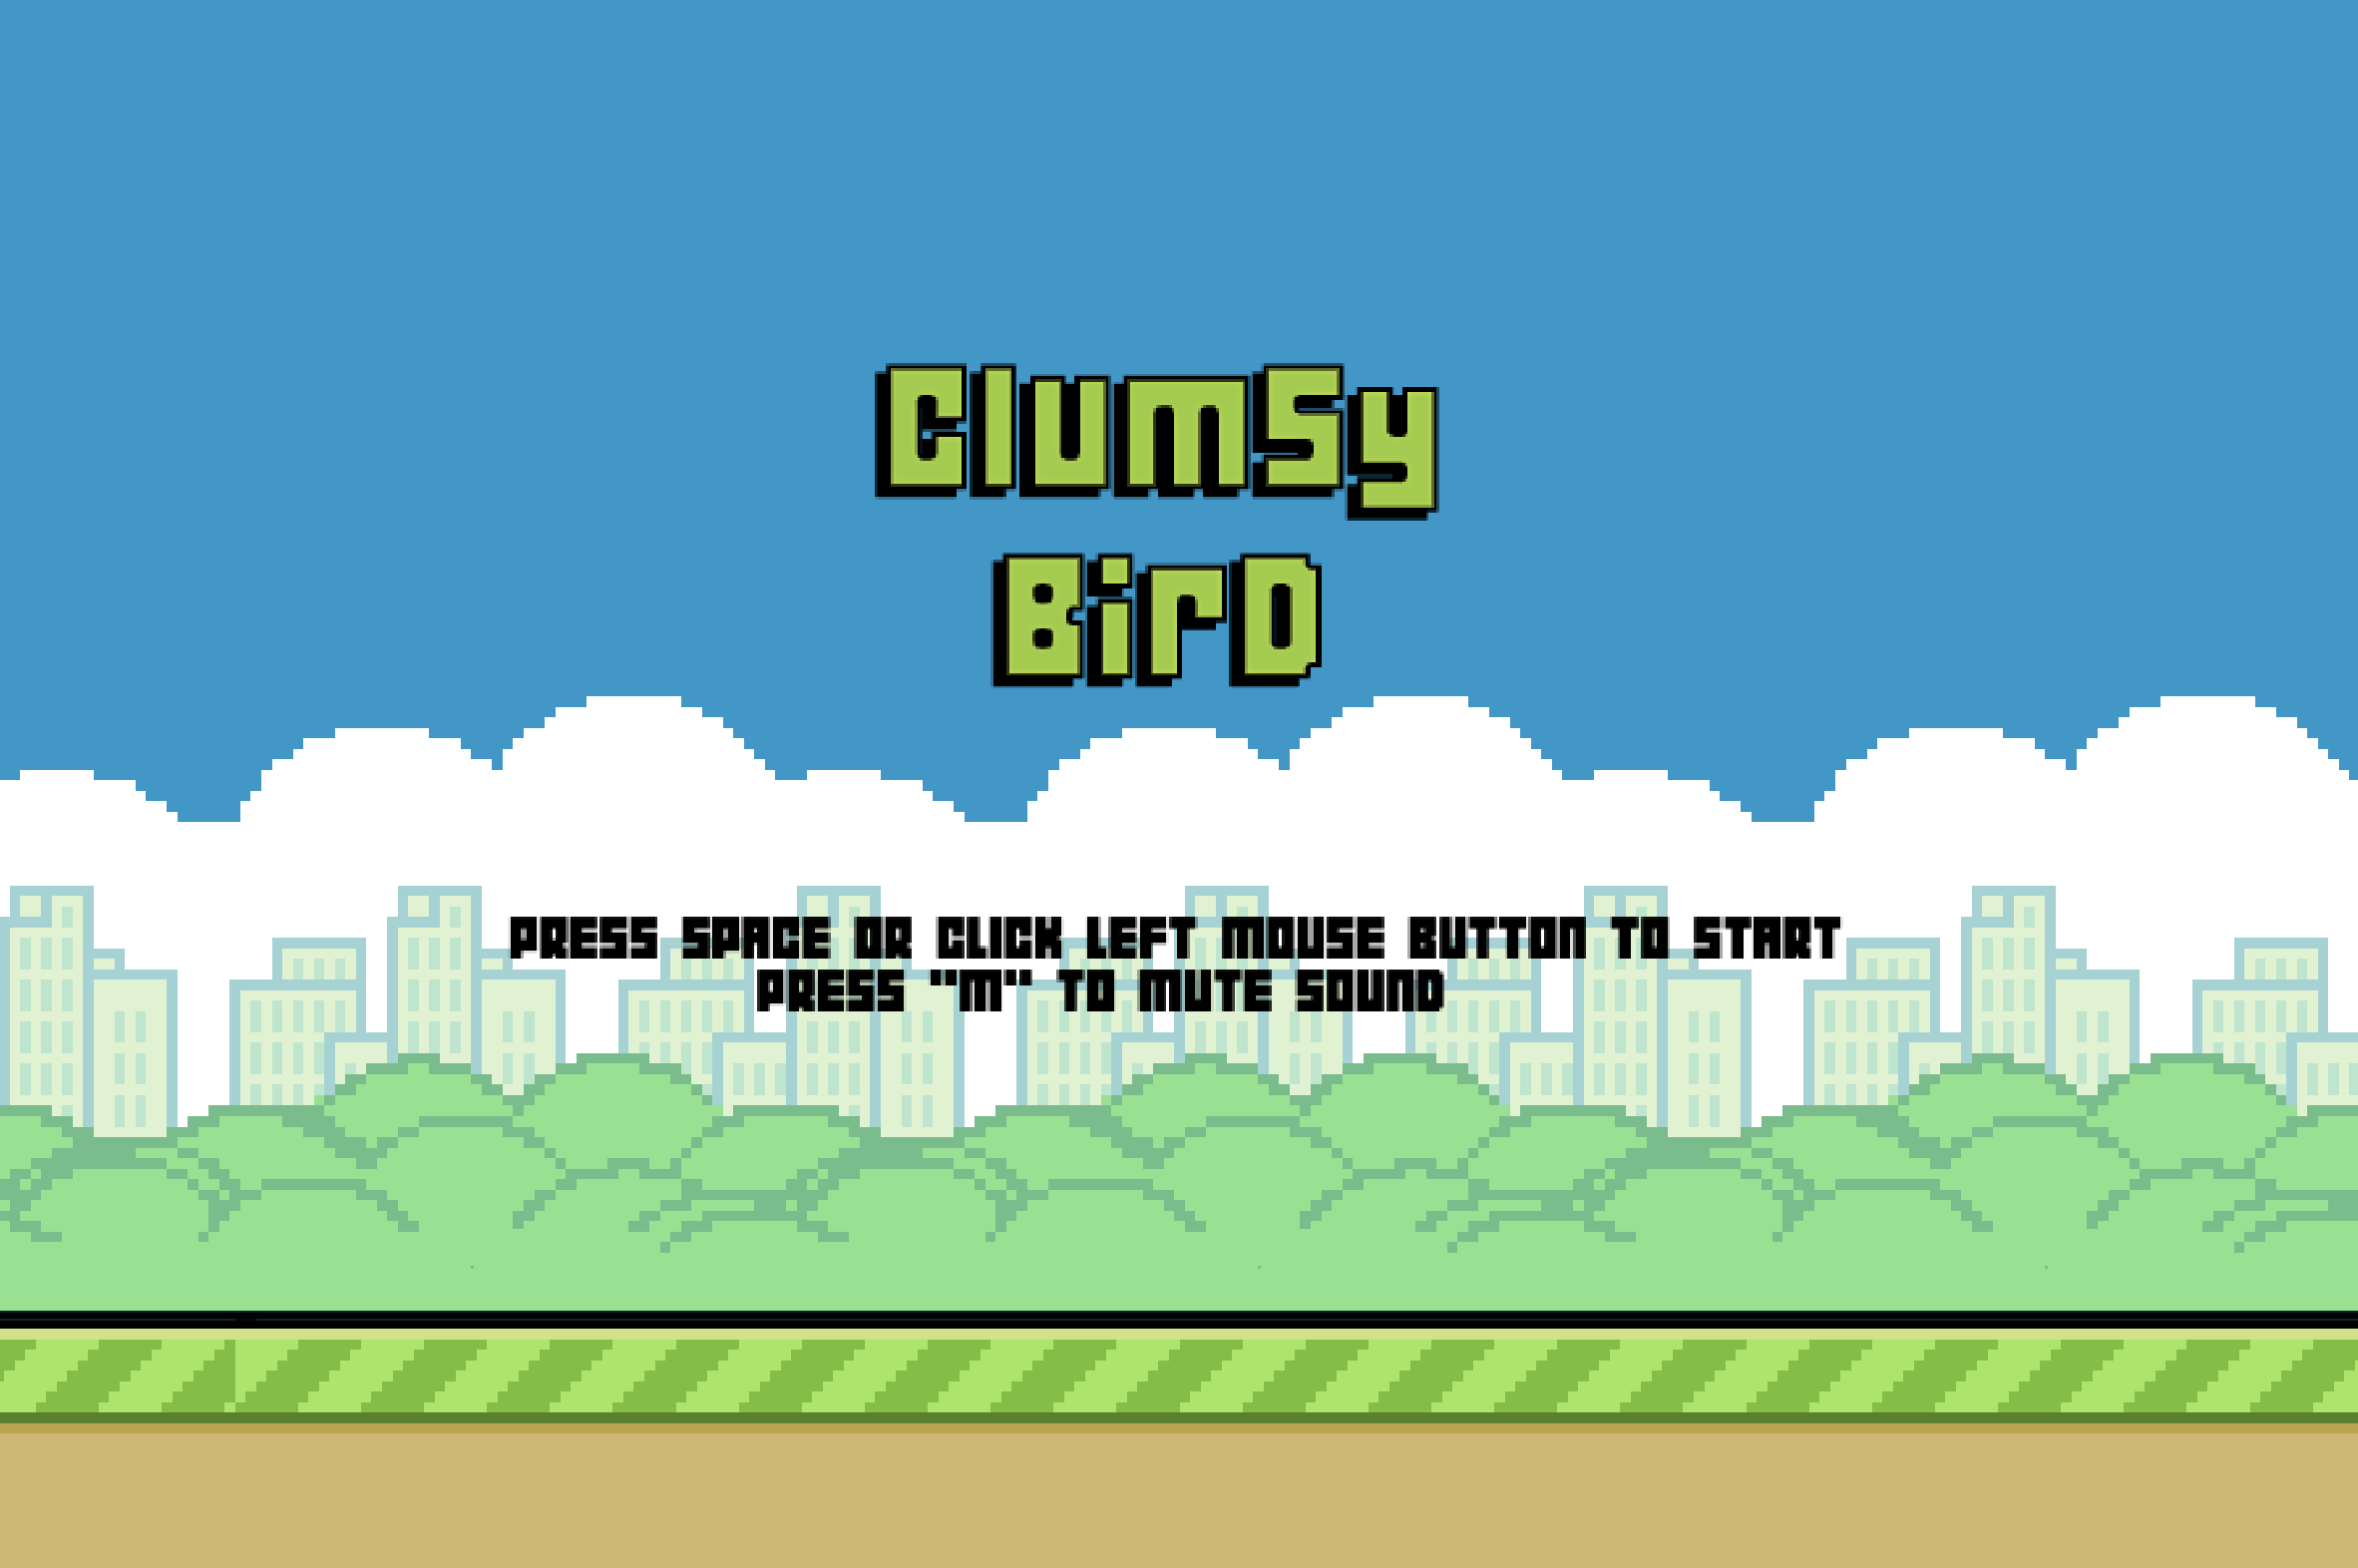
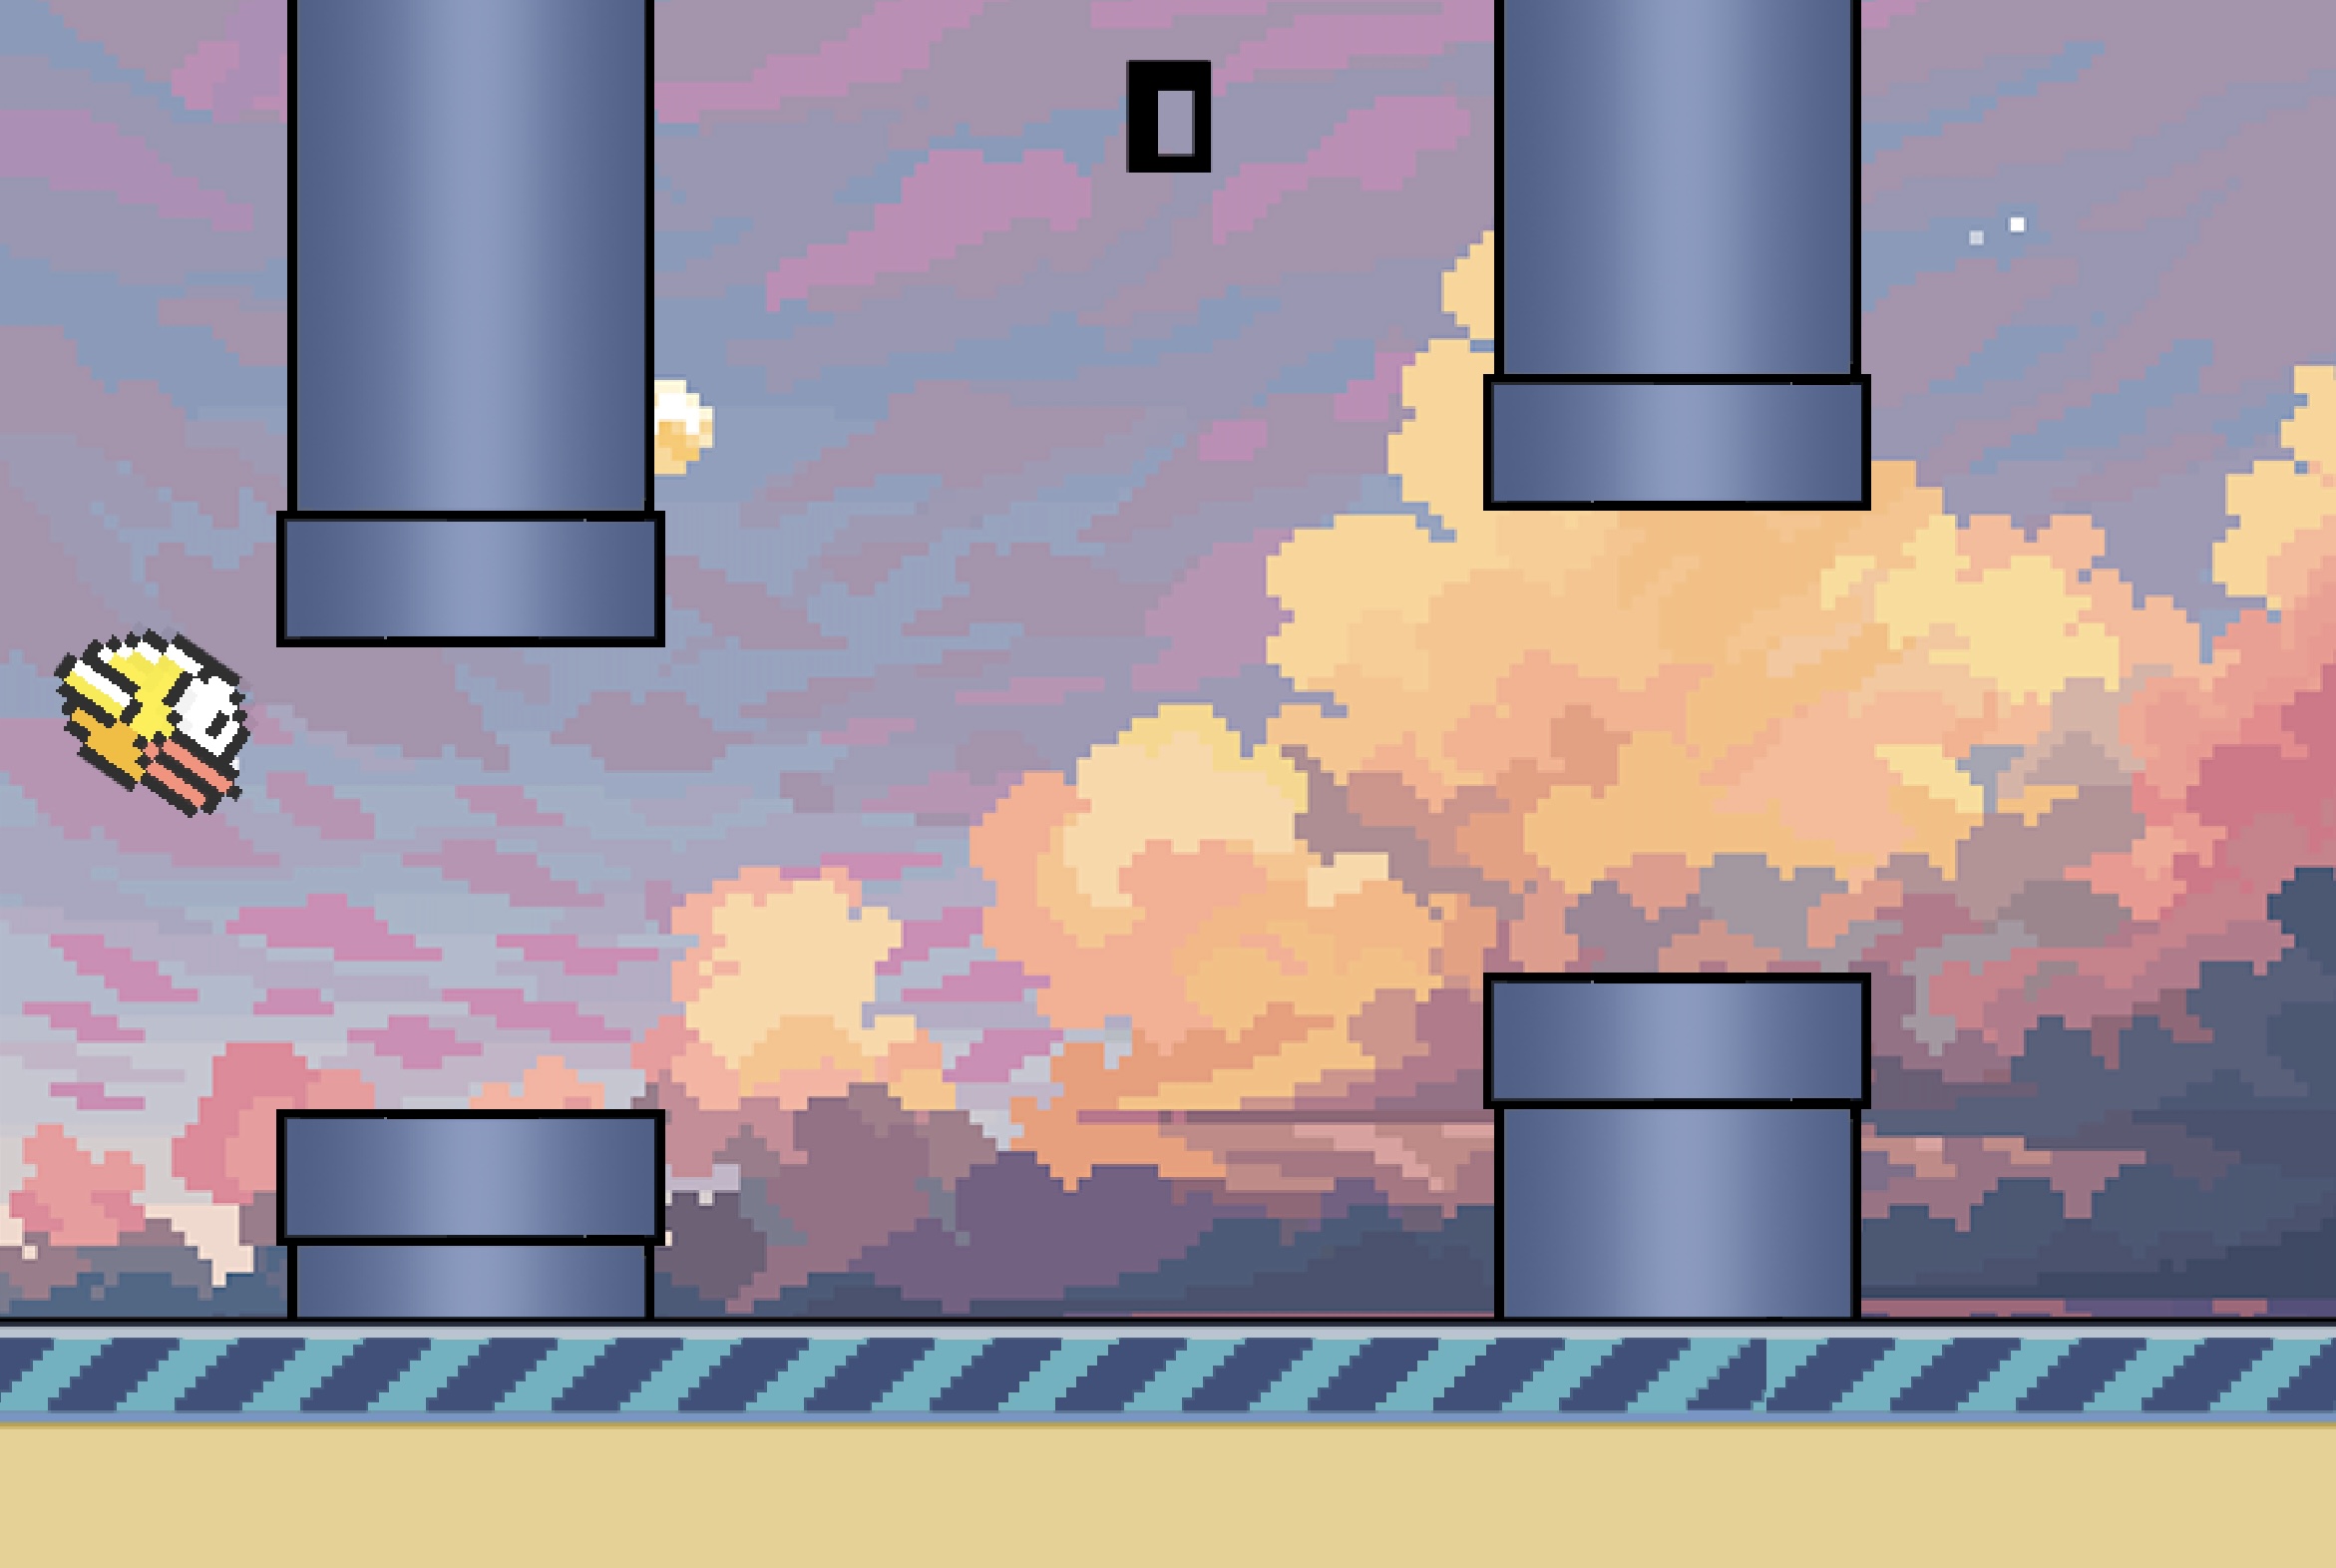
For this project, my colleague Yiwei Wu, and I decided to try out hands at localizing an open-source web game Clumsy Bird into a Chinese version with sunset mode.
File Preparation
1. Source file of the game
Clumsy Bird is an open-source web game provided on GitHub. We first downloaded the source file from Github and analyzed the file type to see if it could be applied to 24Ways.
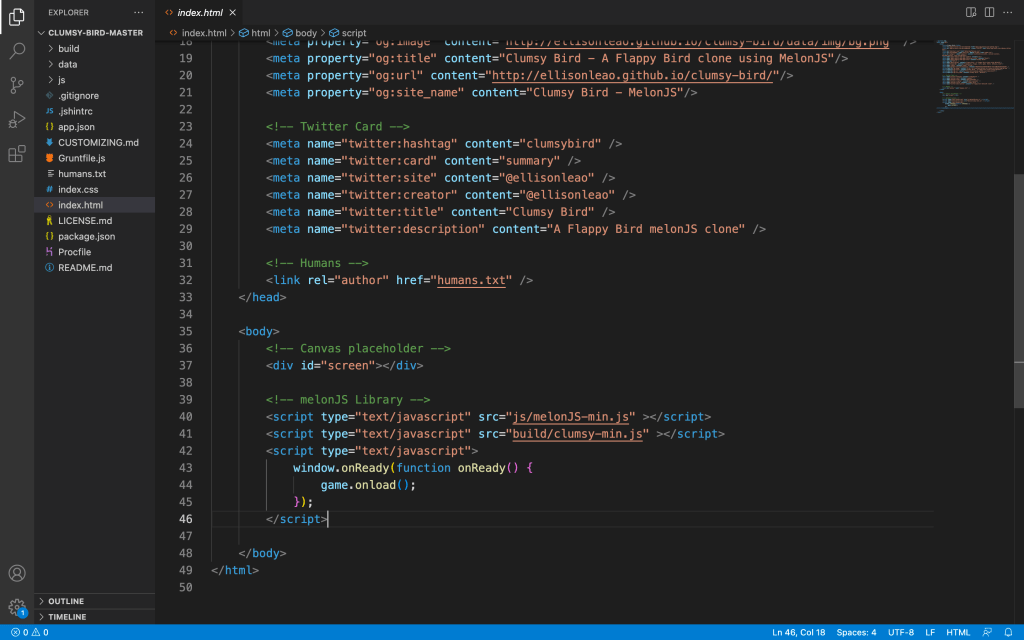
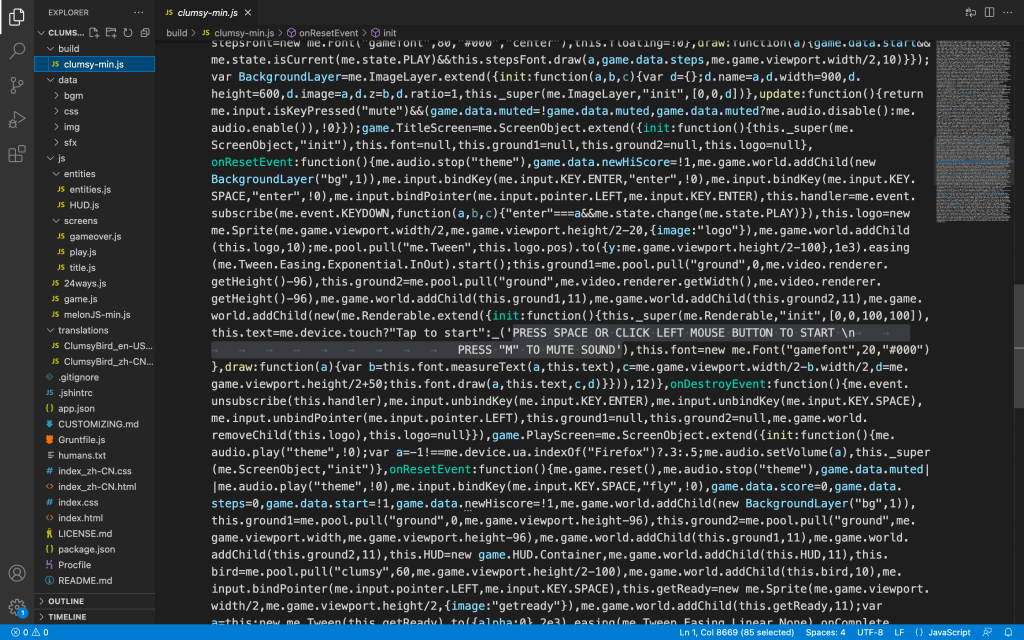
We can see that there is no paragraph or text content in the index.html file, which means that the text contents of the game are in the js files. In this case, 24Ways could be applied.
2. 24Ways
We downloaded the source js file from the source website and moved the js file to the js folder of the game.
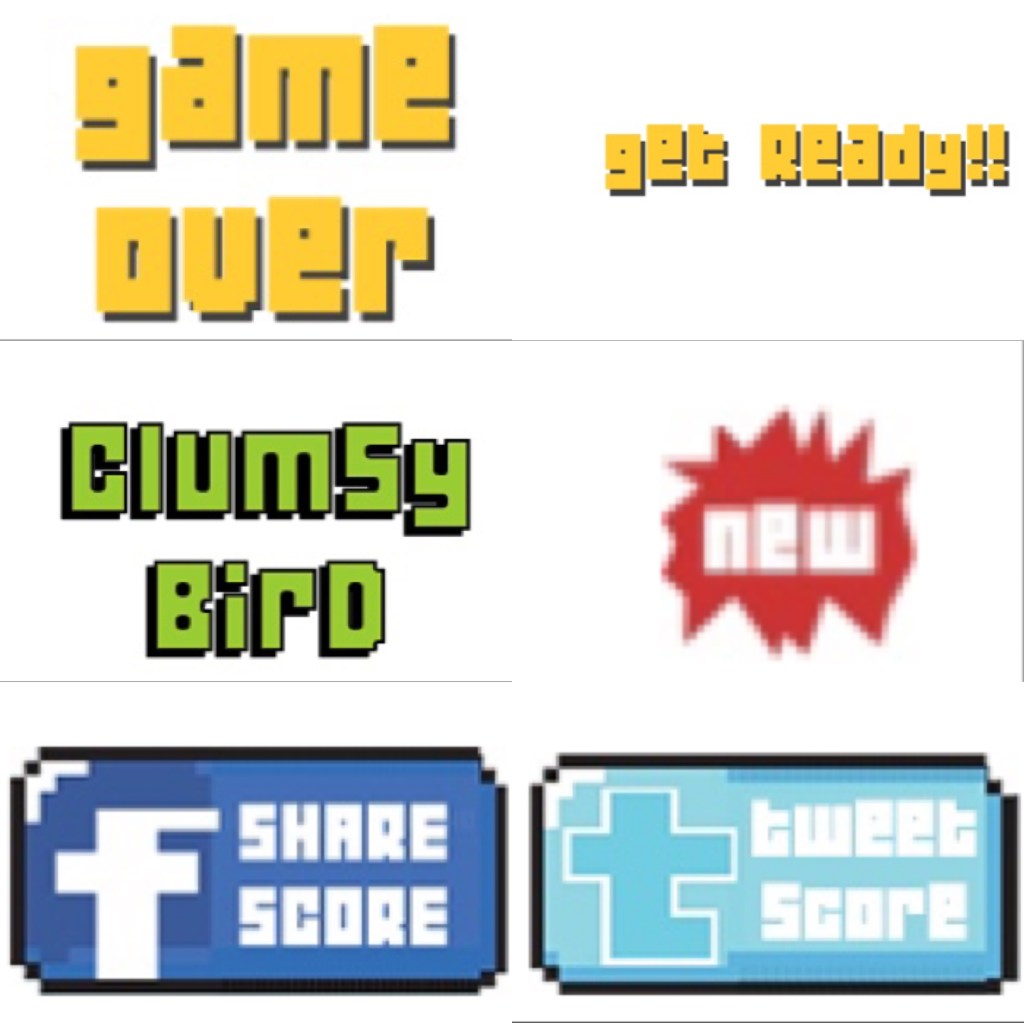
3. Images in the game
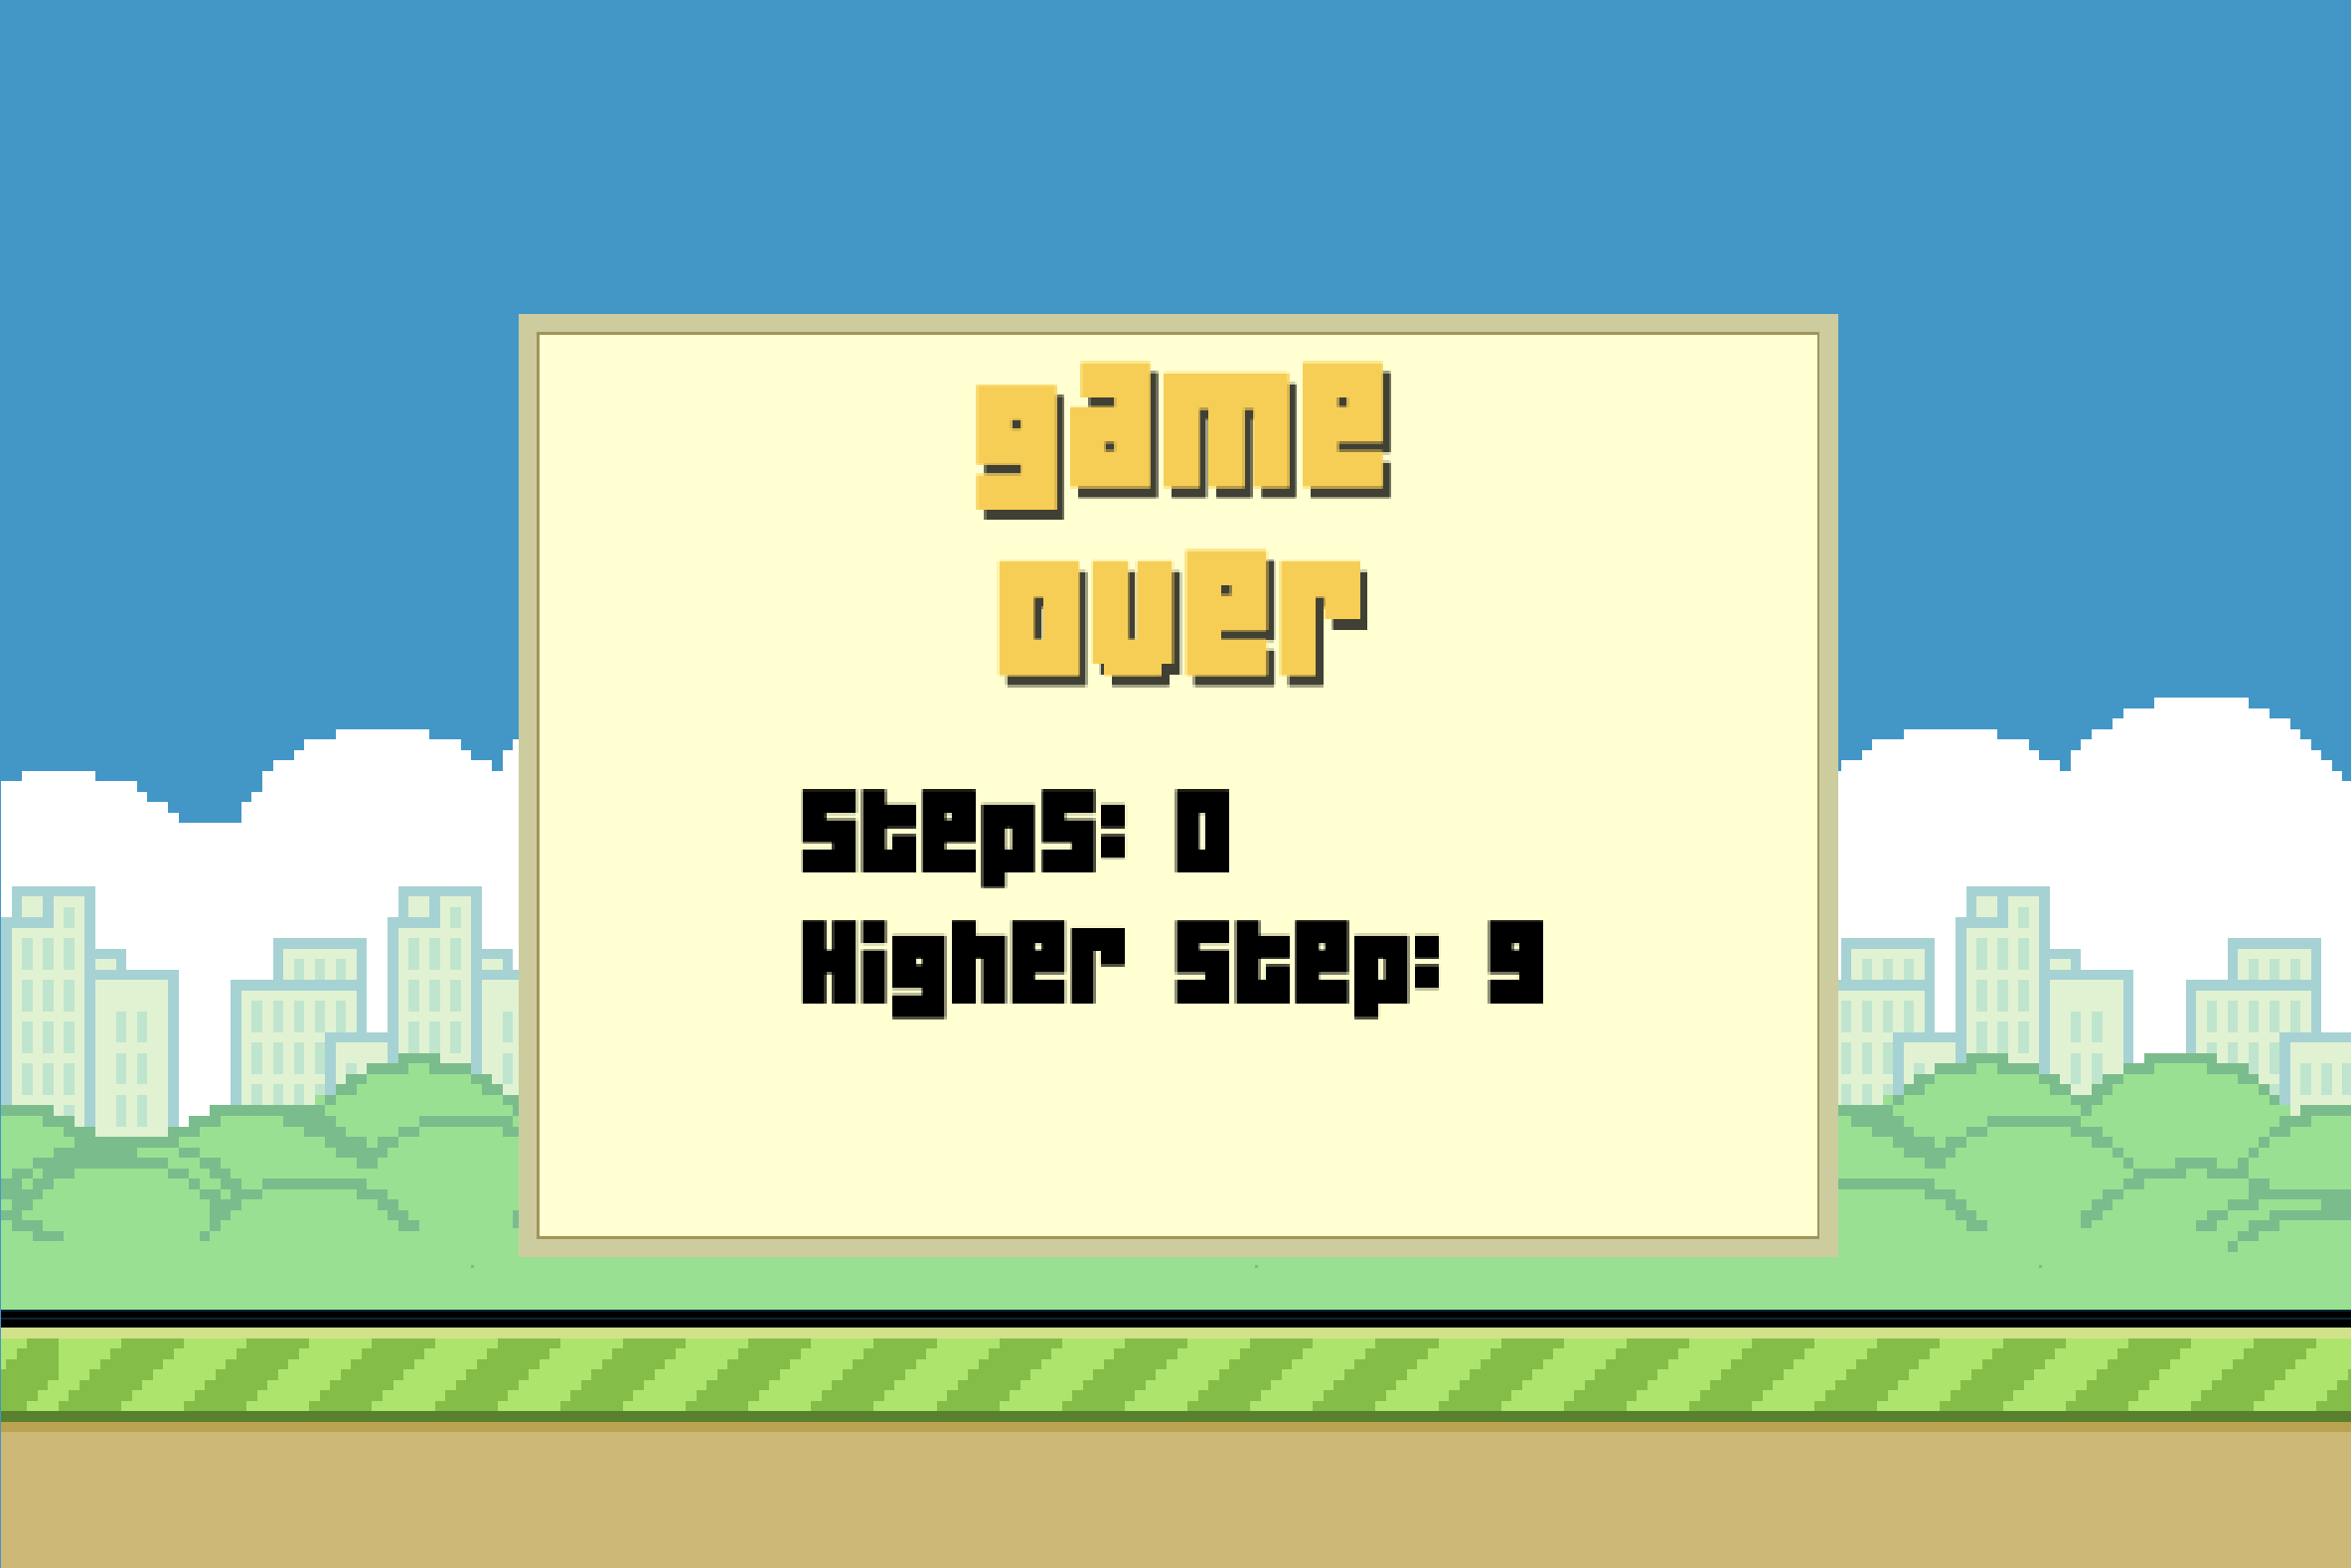
Some text strings are in the image format. Therefore, we need to translate the texts and edit them with Photoshop.
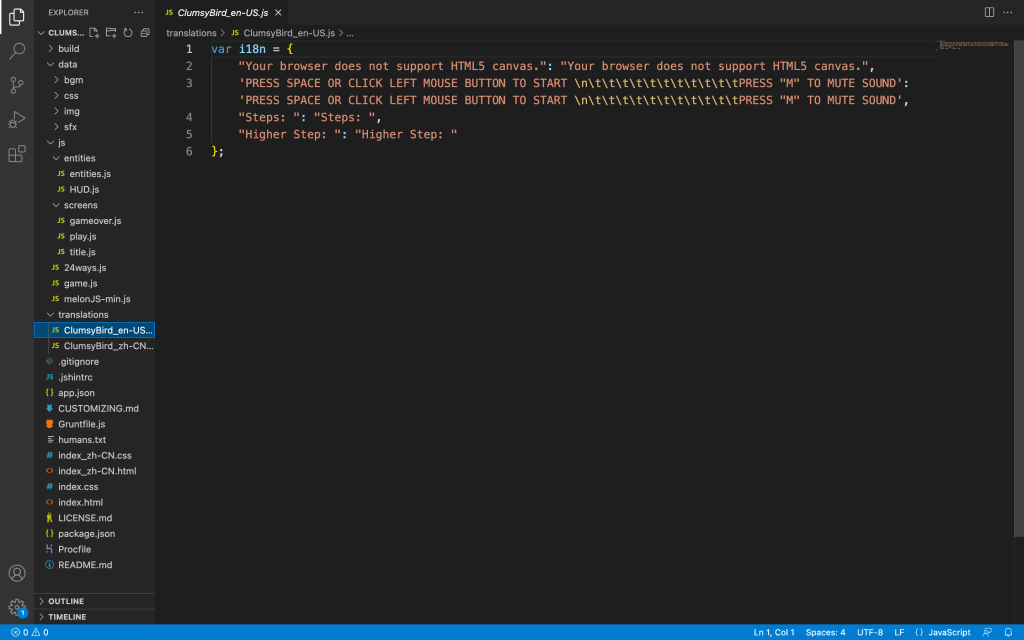
String Extract
After the file preparation was done, we needed to locate the text string from the js file. It was actually an easy step since there are only 5 text strings in the game.
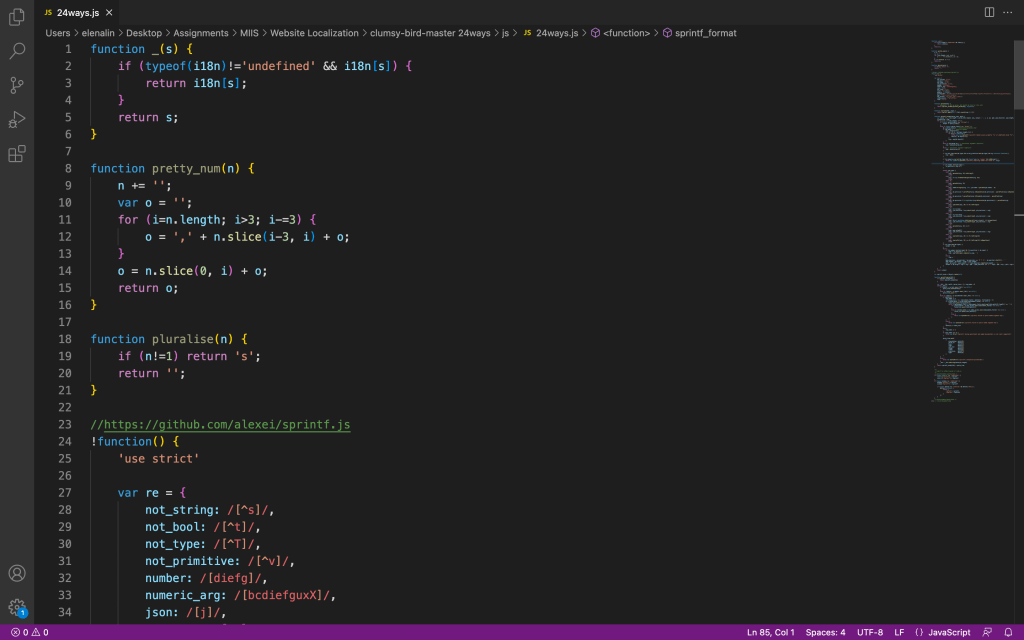
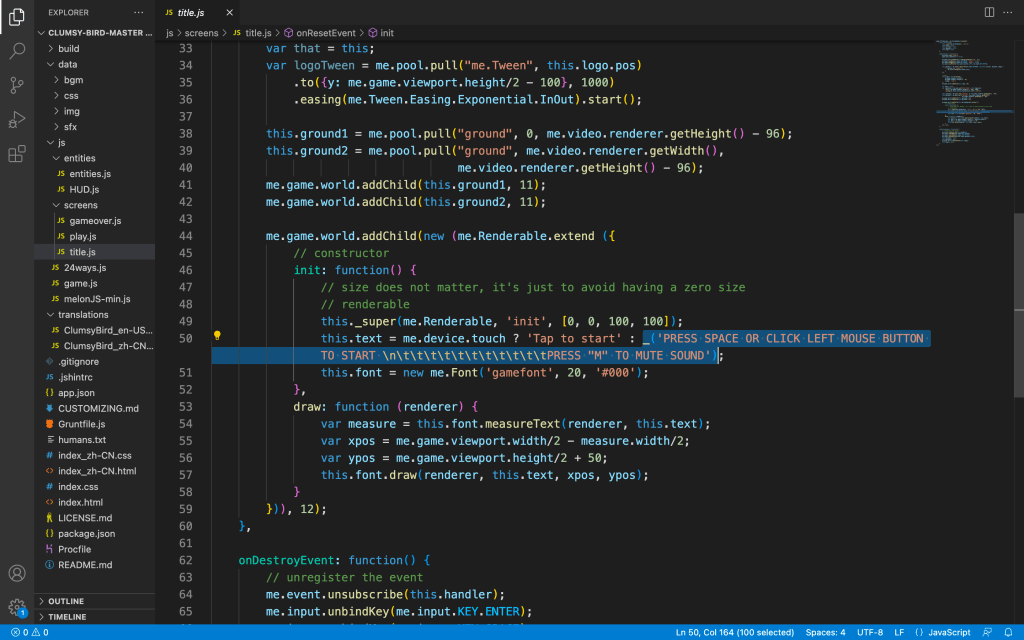
All we needed to do was to use the search function in Visual Studio Code and locate the actual string.
However, after we added the “_()” function to the strings, it didn’t work. In the end, we figured out that the “_()” function should be added to the main js file which is the clumsy-min.js file.
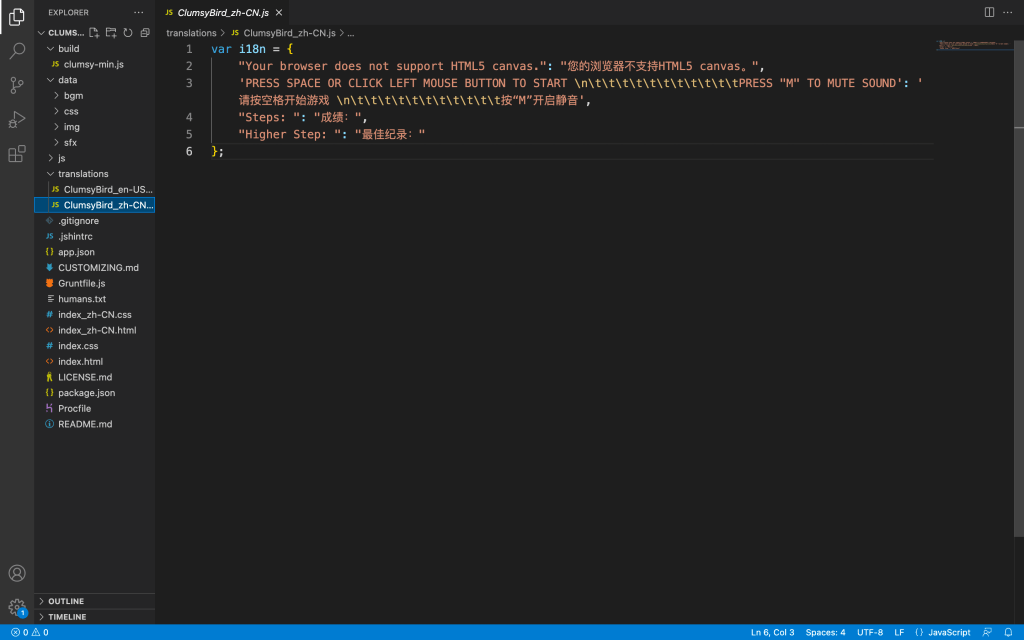
Translation
Since there were only 5 text strings, it was pretty easy to translate the texts. We didn’t even need to translate it via CAT tools.
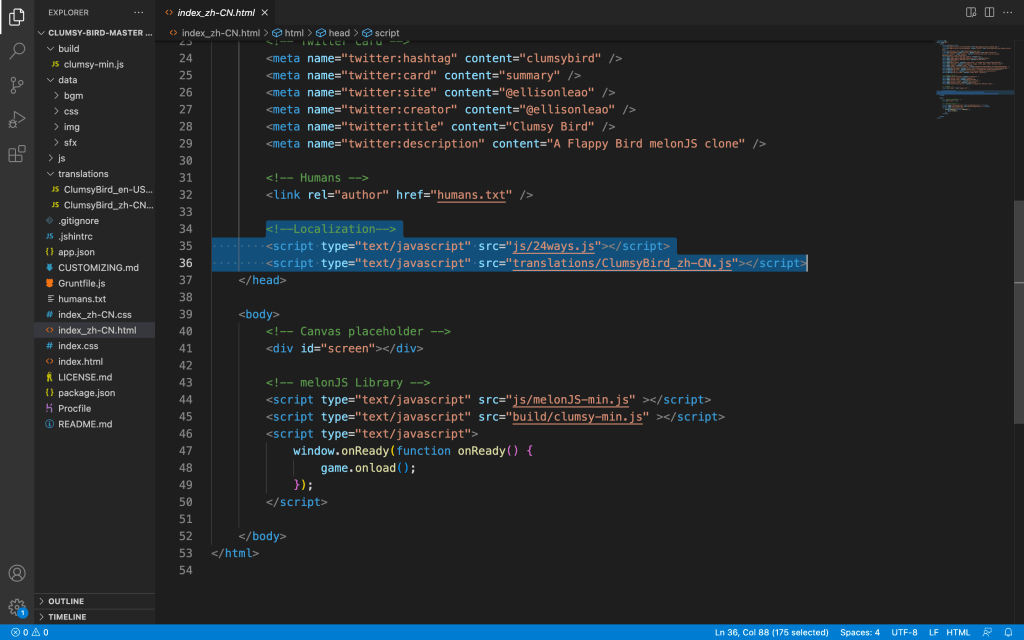
After the translation is done, we need to put the file into a translation folder and link the 24Ways.js file and the ClumsyBird_zh-CN.js file to the index.html file.
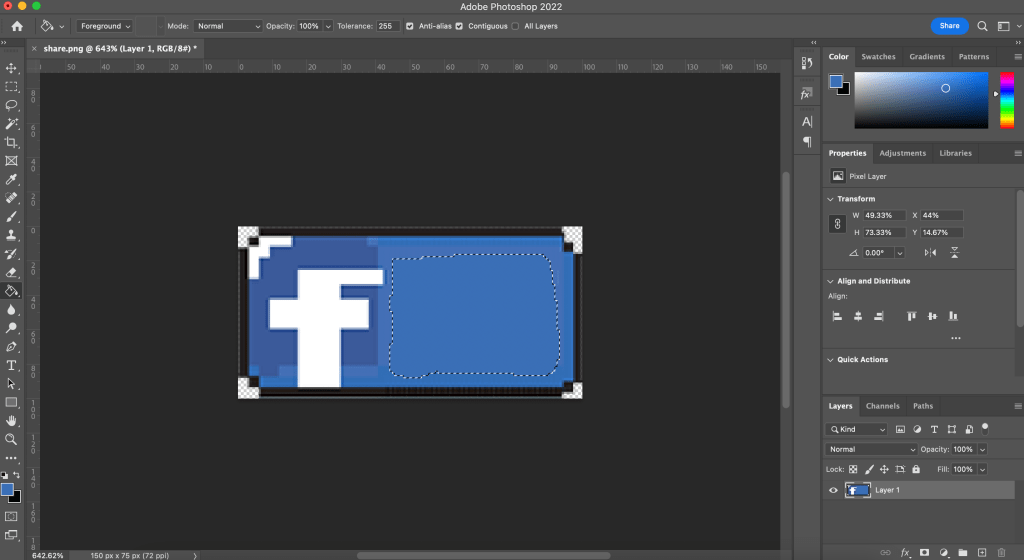
Photoshop
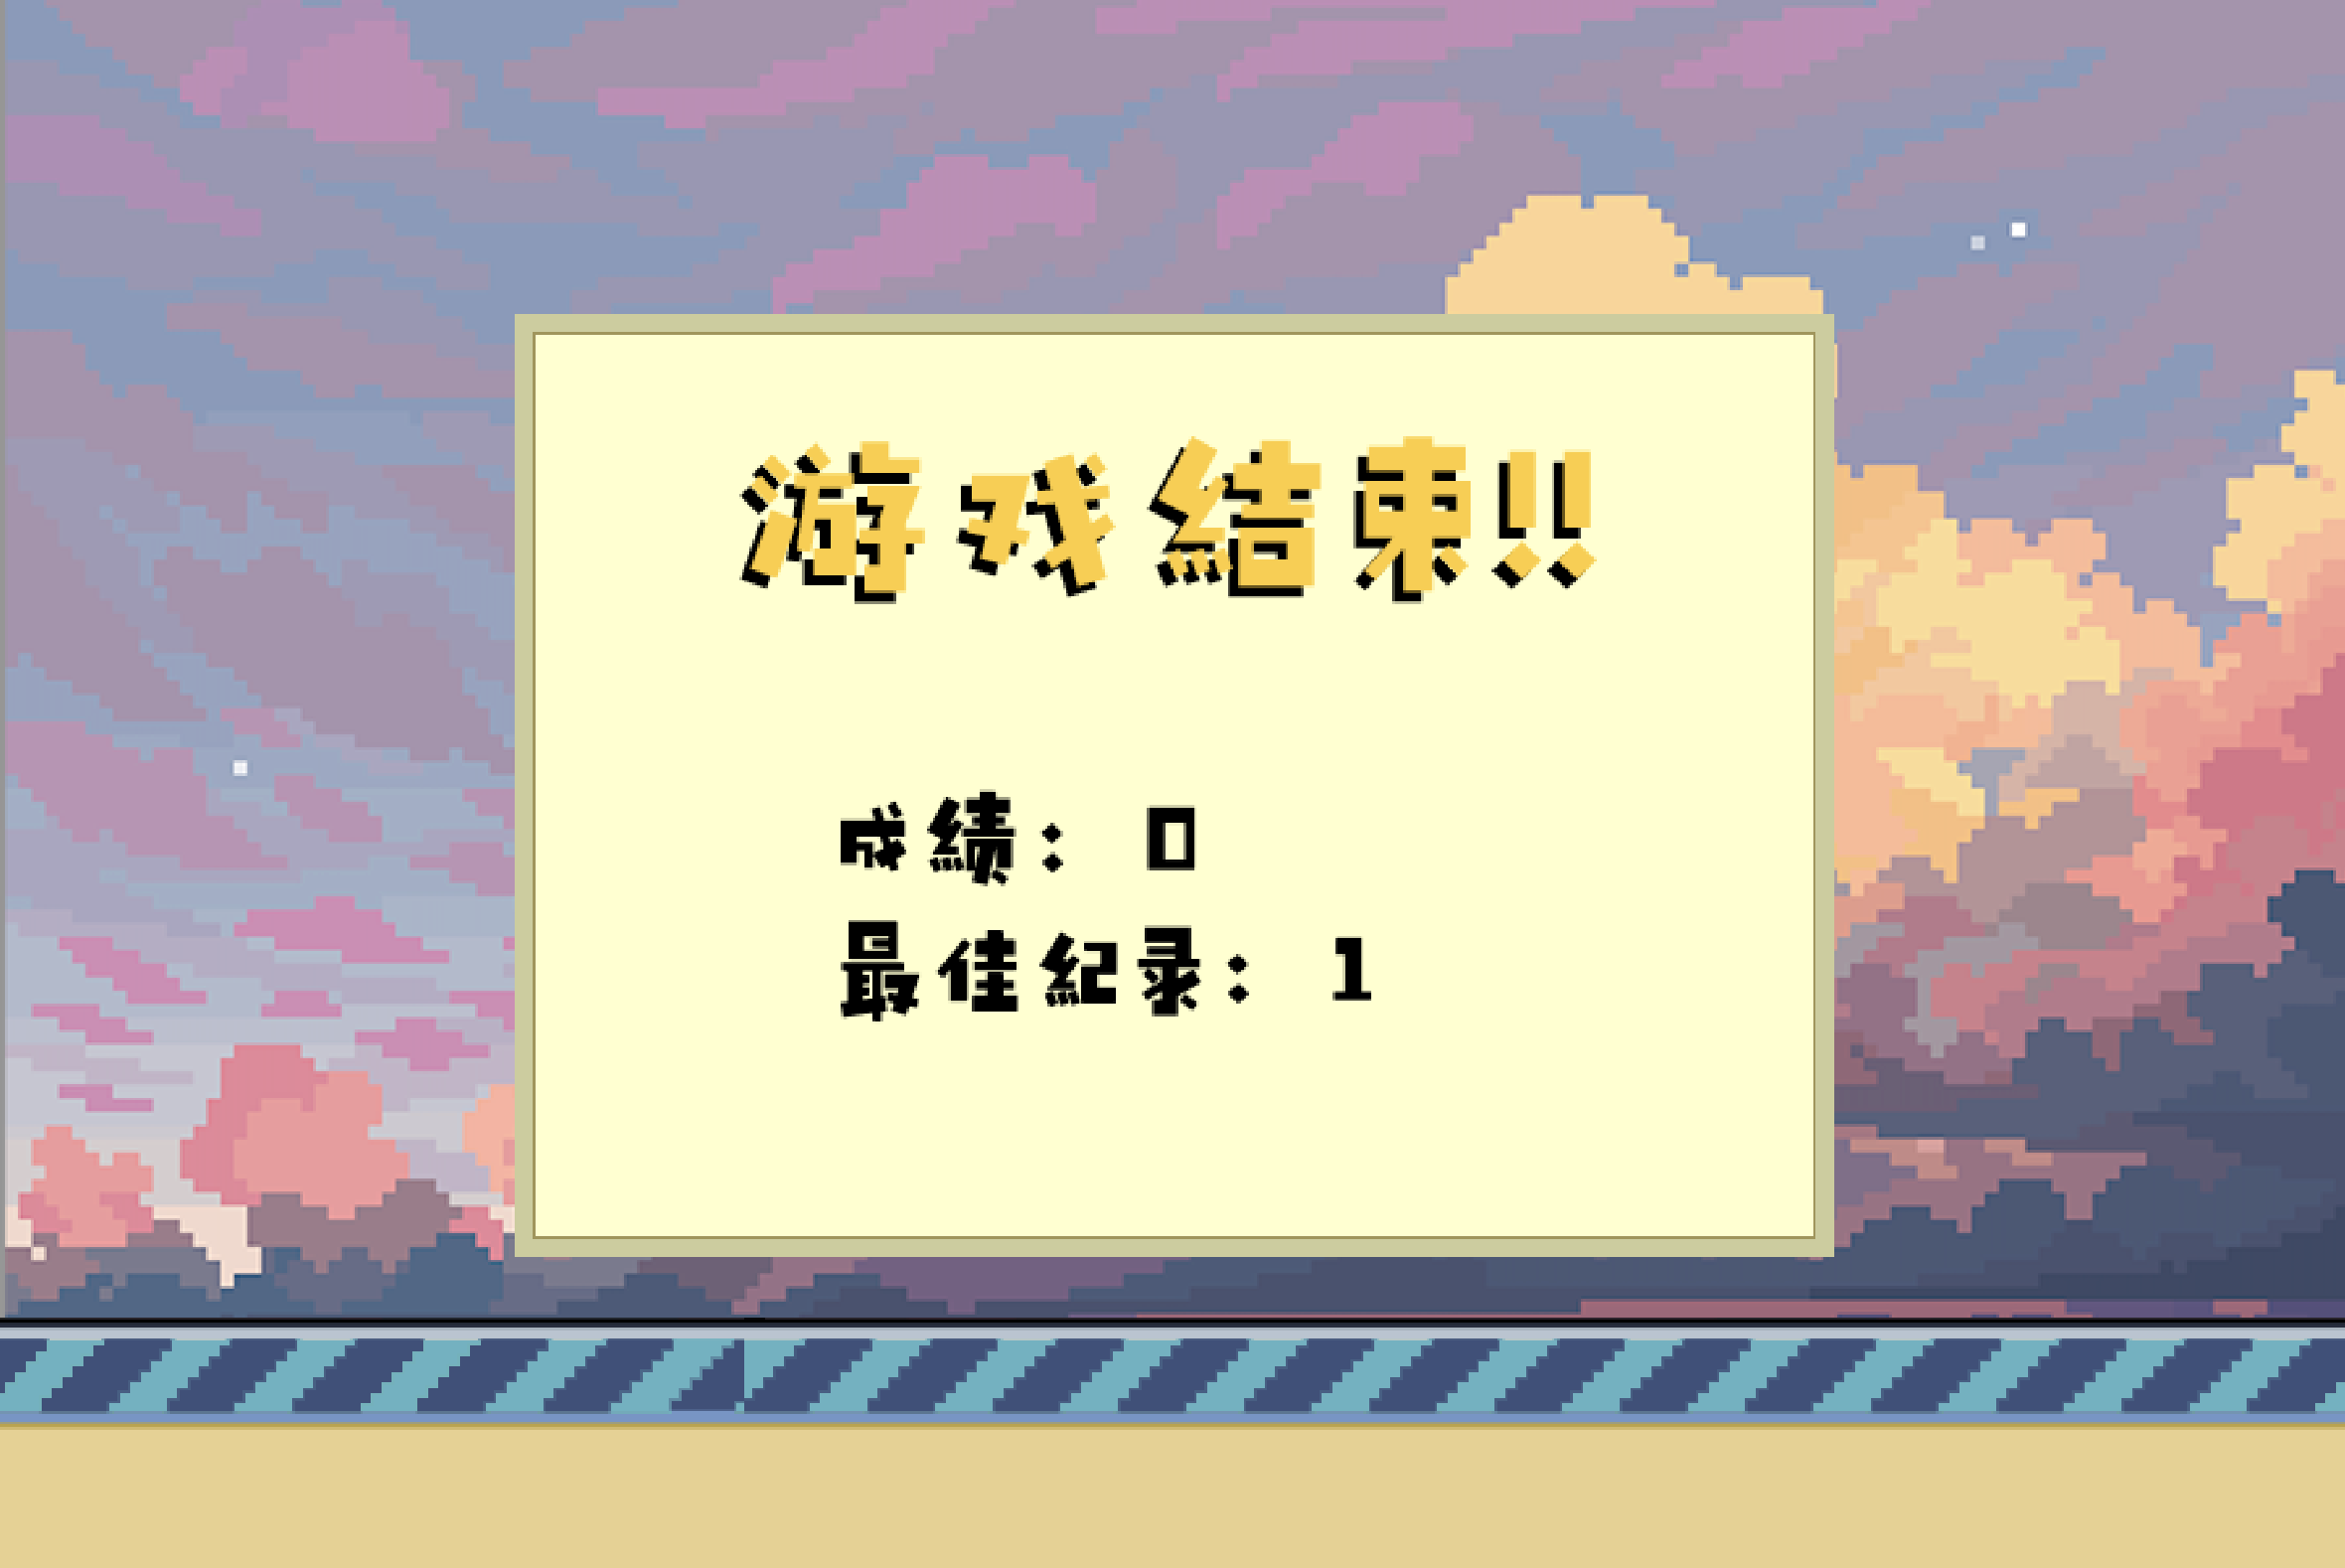
Editing the image in Photoshop is not that difficult. First, we used the Lasso tool to select the area with the words. Then, we used the Paint Bucket tool to fill the area with the background color. After that, we used the Horizontal Type tool to add the translation. In the end, we exported the png file and replaced it with the original image.
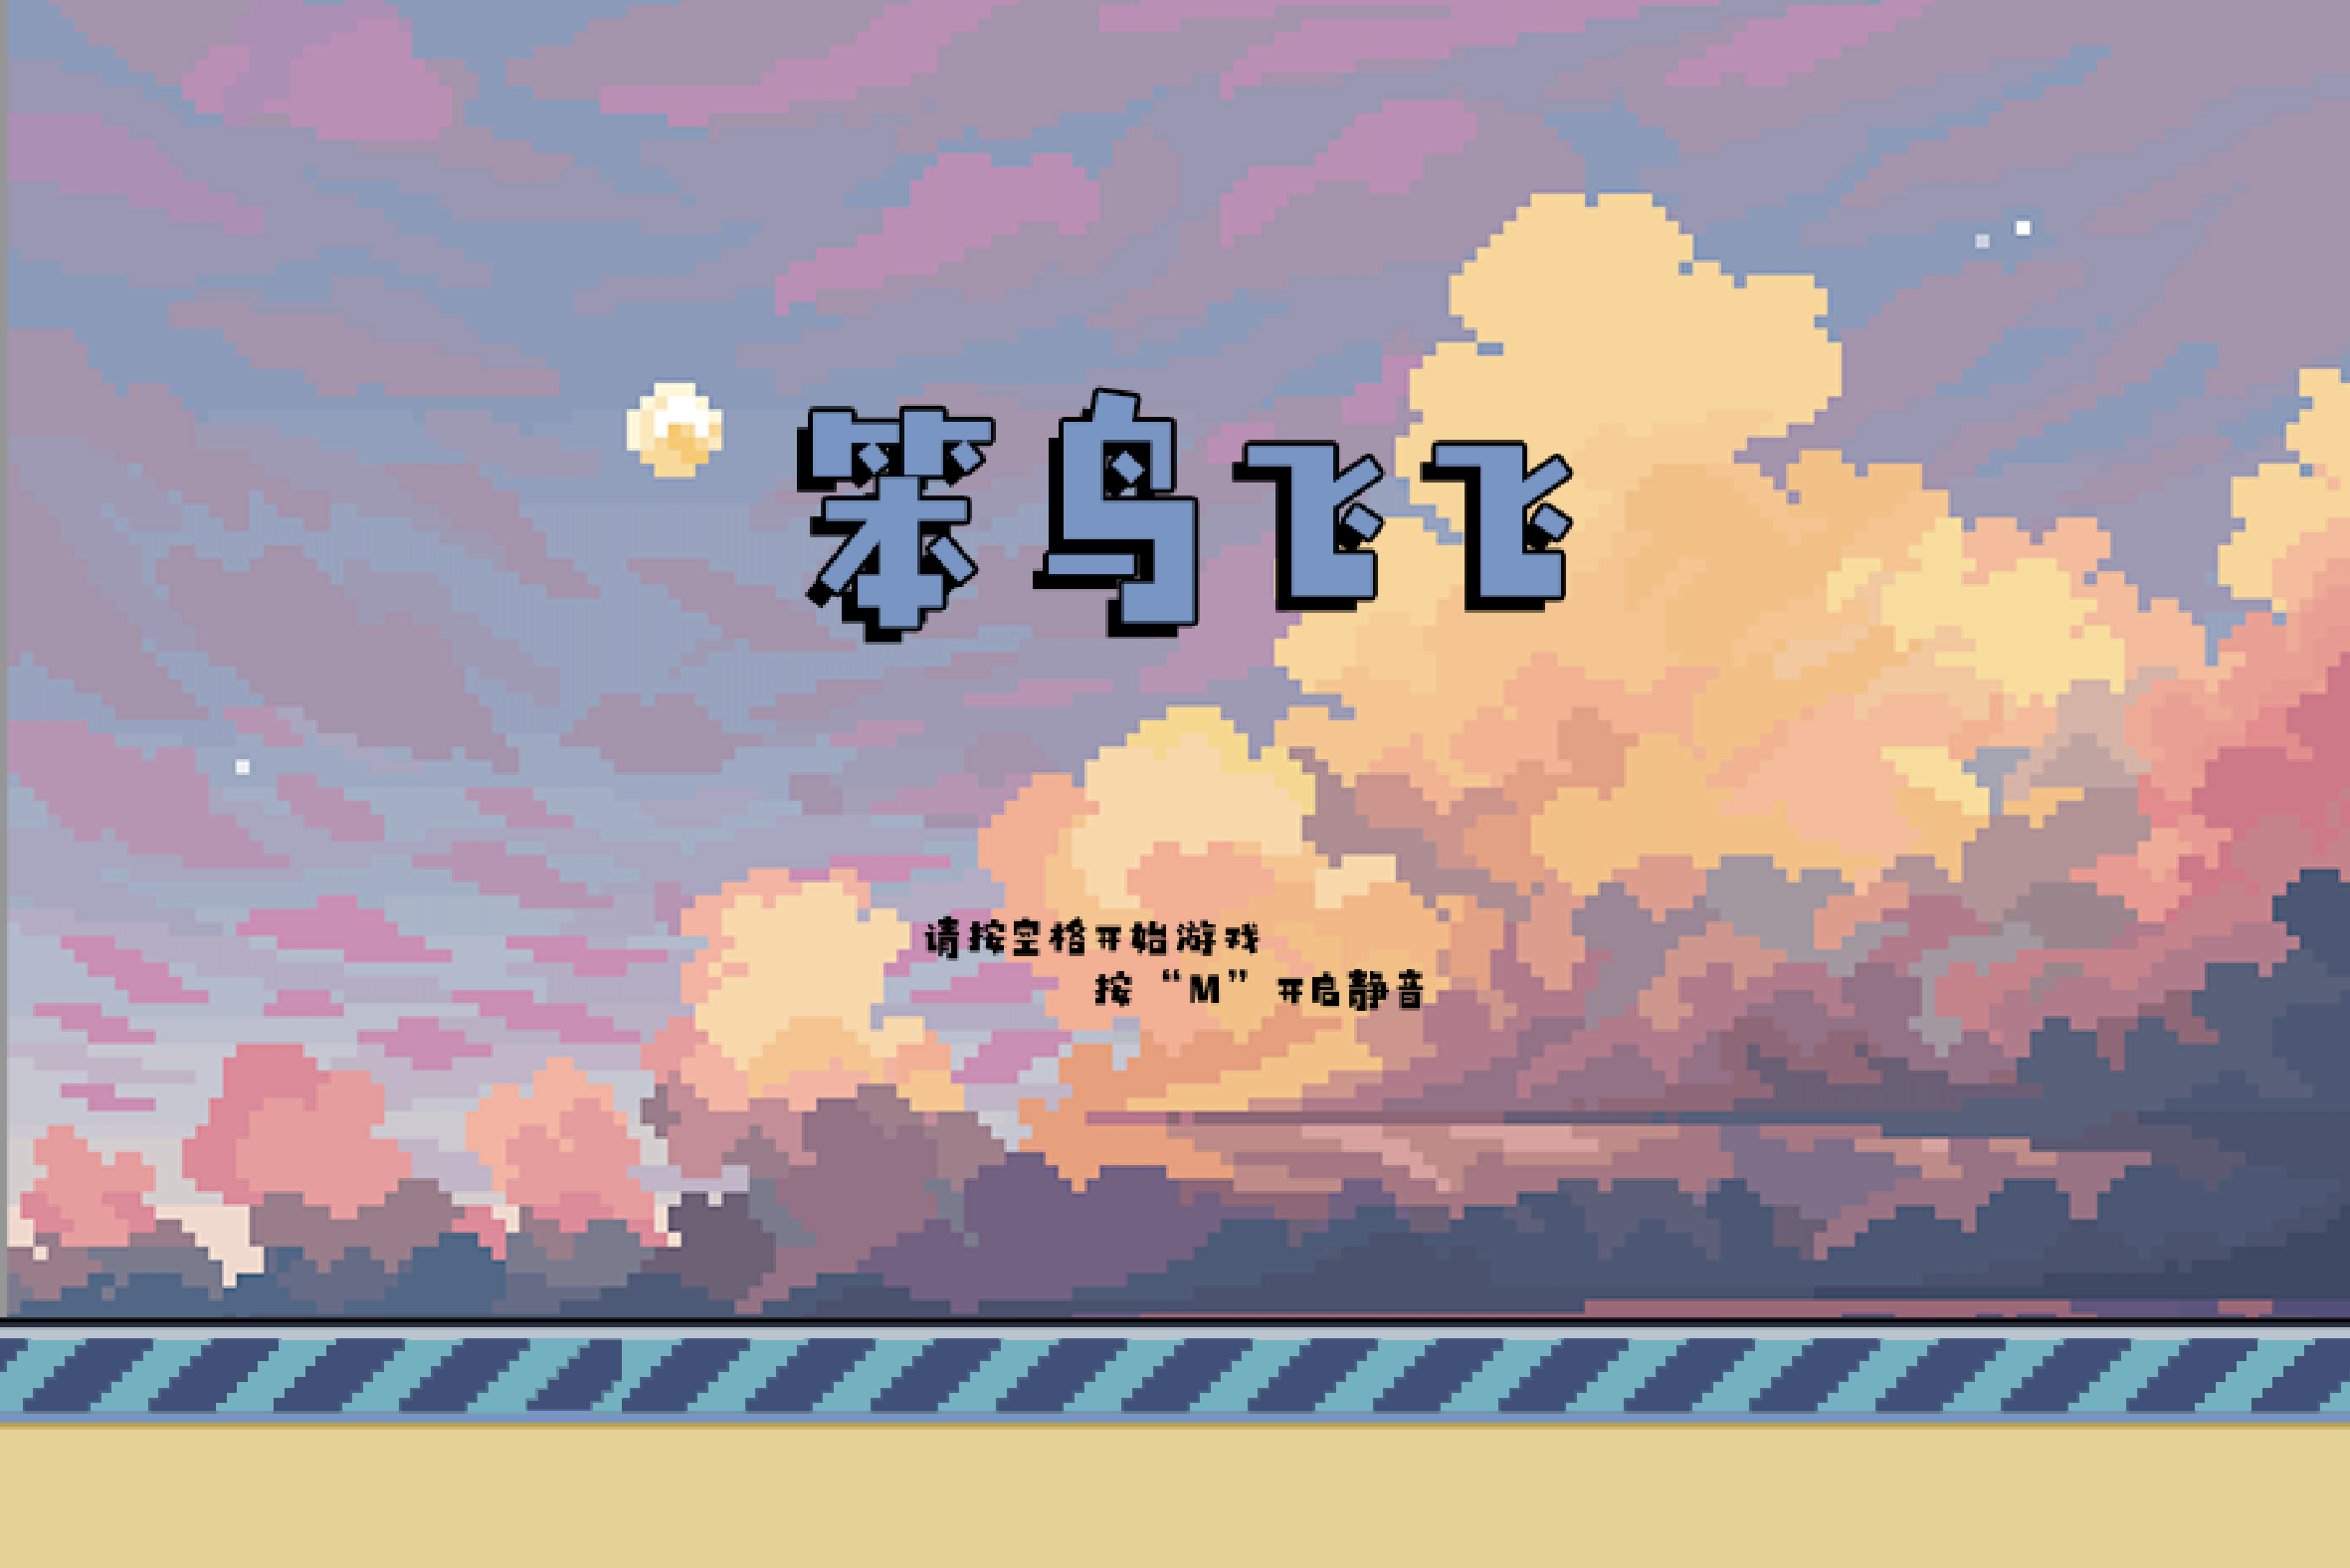
Other than that, since we decided to change the game mode into the Sunset mode, we also played around with the background, pipe, ground, and bird images, as well as the color of the fonts.
Font
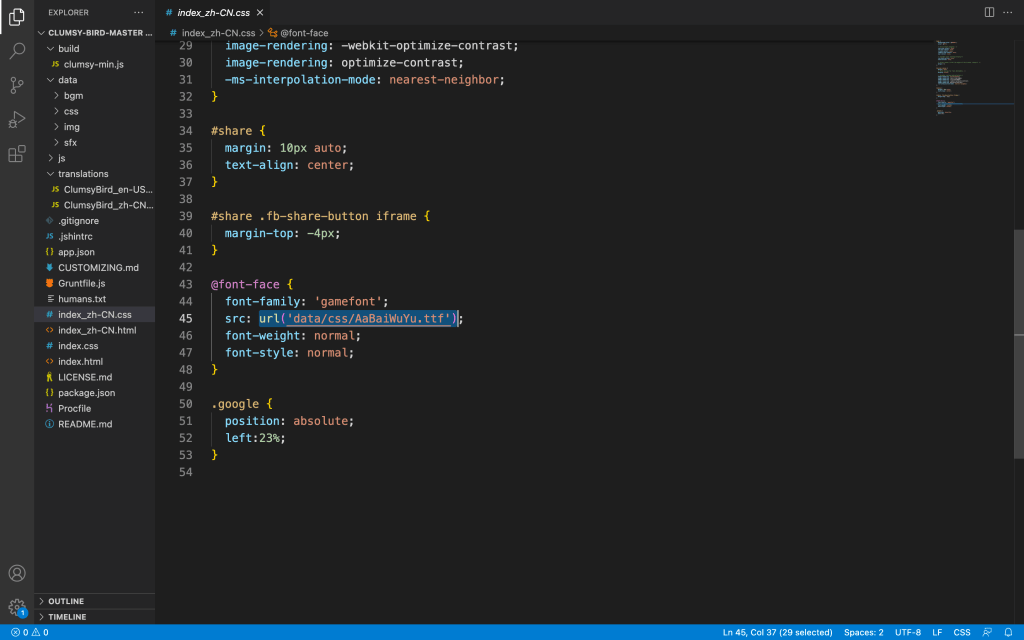
Since this is a pixel-style game, we wanted to choose a cuter font. We found a very cute Chinese font at Aa Font.
After the selection of fonts, we need to play around with the CSS file. Basically, we just changed the URL of the font file and kept the font-family name of the font.